> ## Documentation Index
> Fetch the complete documentation index at: https://docs.flexprice.io/llms.txt
> Use this file to discover all available pages before exploring further.
# Flexprice Cloud
> Learn how to quickly get started with Flexprice Cloud - the fastest way to integrate usage-based pricing
## Quick Setup
Getting started with Flexprice Cloud is straightforward and requires no infrastructure setup. Follow these simple steps:
1. Visit [Flexprice Cloud](https://admin.flexprice.io/auth)
2. Sign up using either:
* Google account
* Email and password
That's it! Your Flexprice Cloud instance is ready to use.
## Understanding Environments
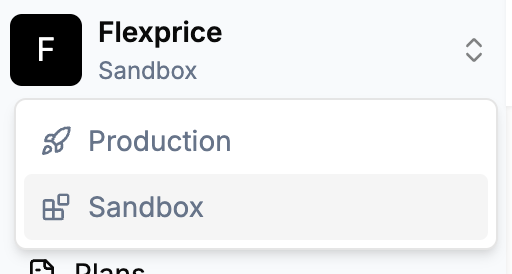
When you first log in, you'll be placed in the **Sandbox** environment. Flexprice provides different environments to help you manage your pricing across different stages:
A pre-configured environment with Cursor pricing template for you to experiment and learn
Your live environment for real customer data and billing
 ## Exploring the Sample Setup
The Sandbox environment comes pre-configured with Cursor's pricing model, giving you a practical example of how to structure complex pricing:
Explore the detailed guide on how Cursor's pricing is implemented in Flexprice
## Setting up API Keys
To integrate Flexprice with your application, you'll need to generate an API key:
1. Navigate to the **Developers** tab
## Exploring the Sample Setup
The Sandbox environment comes pre-configured with Cursor's pricing model, giving you a practical example of how to structure complex pricing:
Explore the detailed guide on how Cursor's pricing is implemented in Flexprice
## Setting up API Keys
To integrate Flexprice with your application, you'll need to generate an API key:
1. Navigate to the **Developers** tab
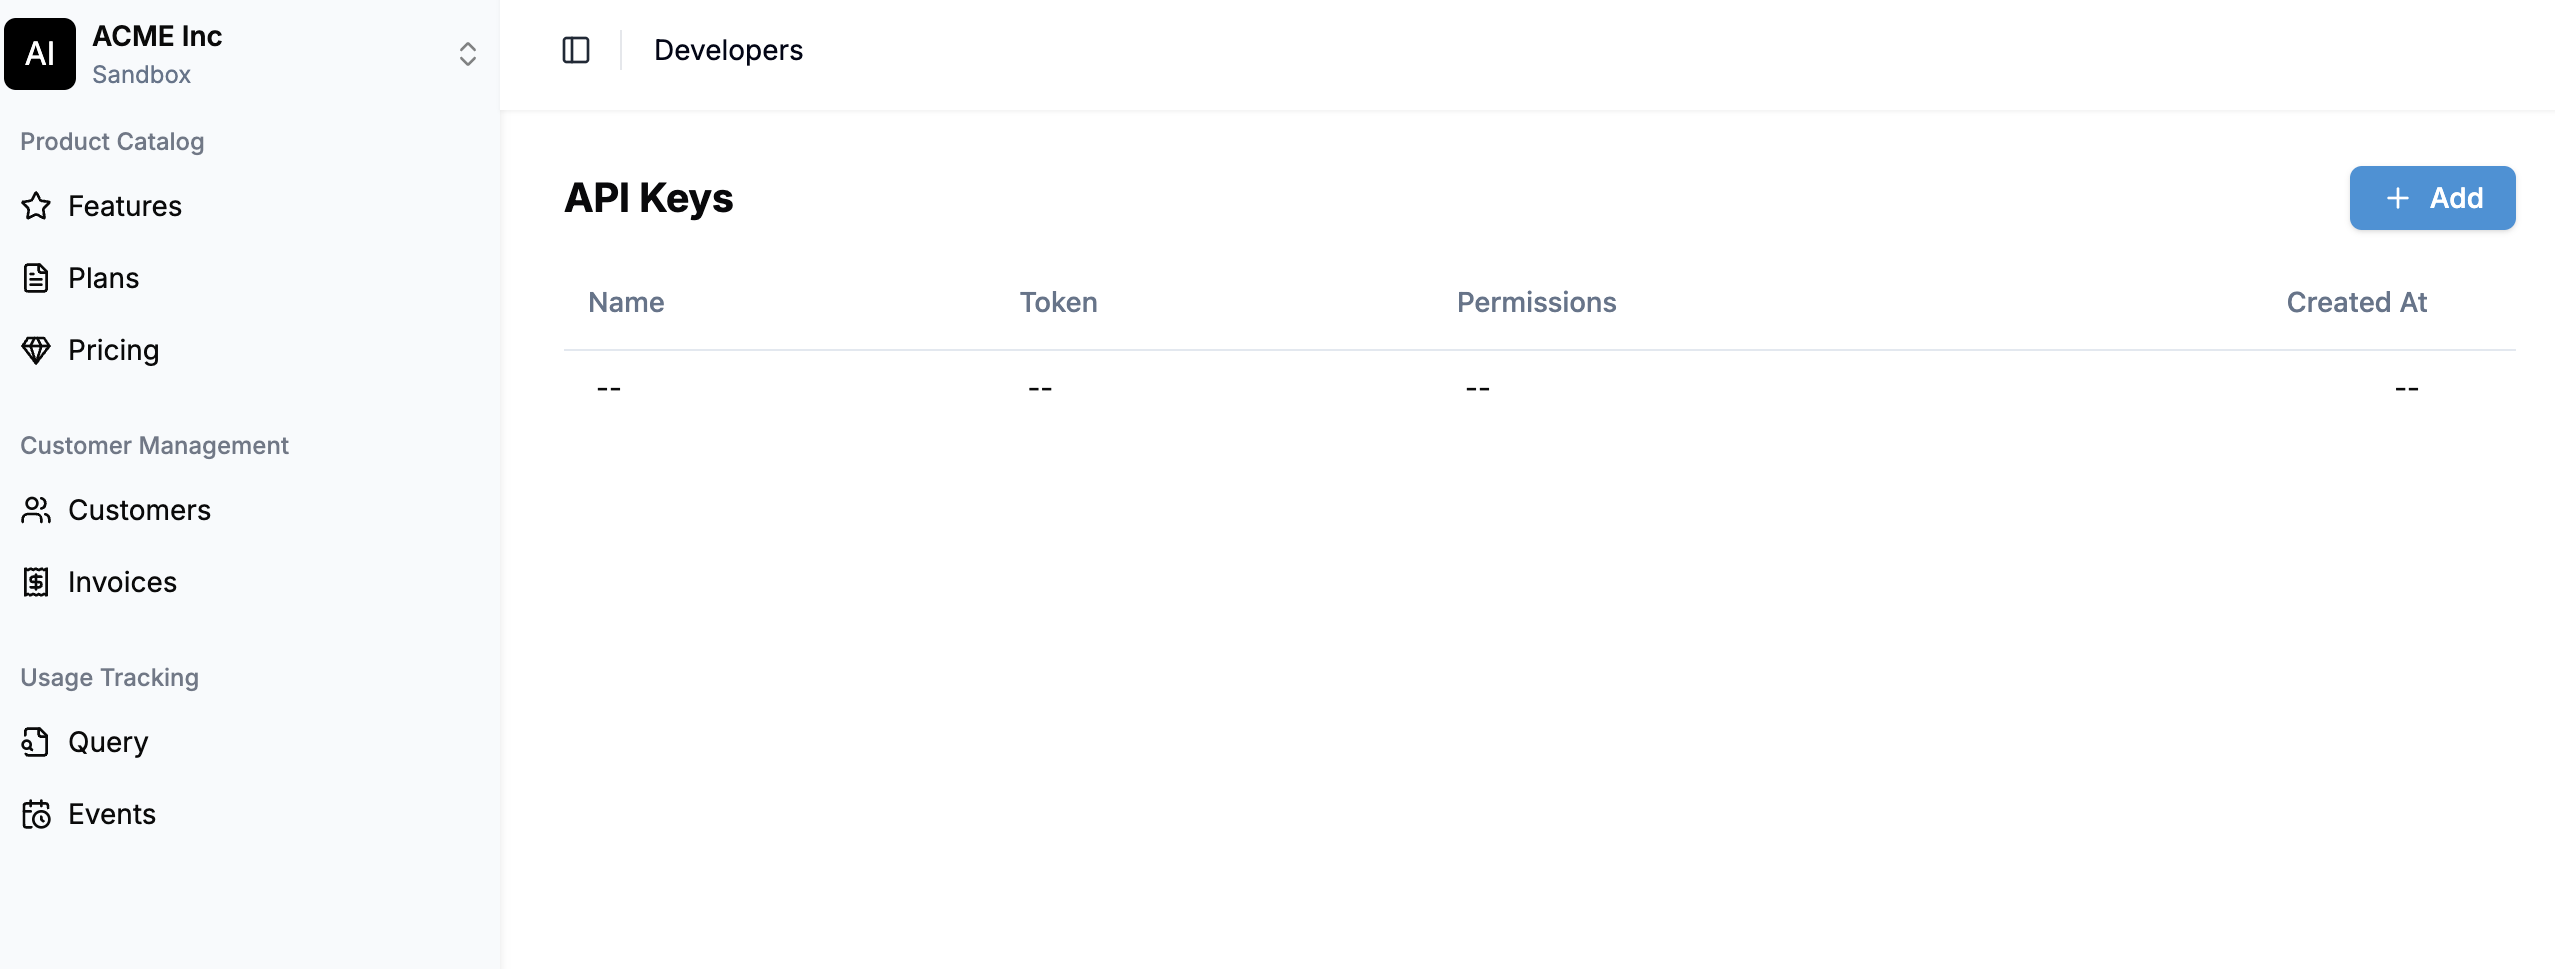 2. Click **Add** to create a new API key
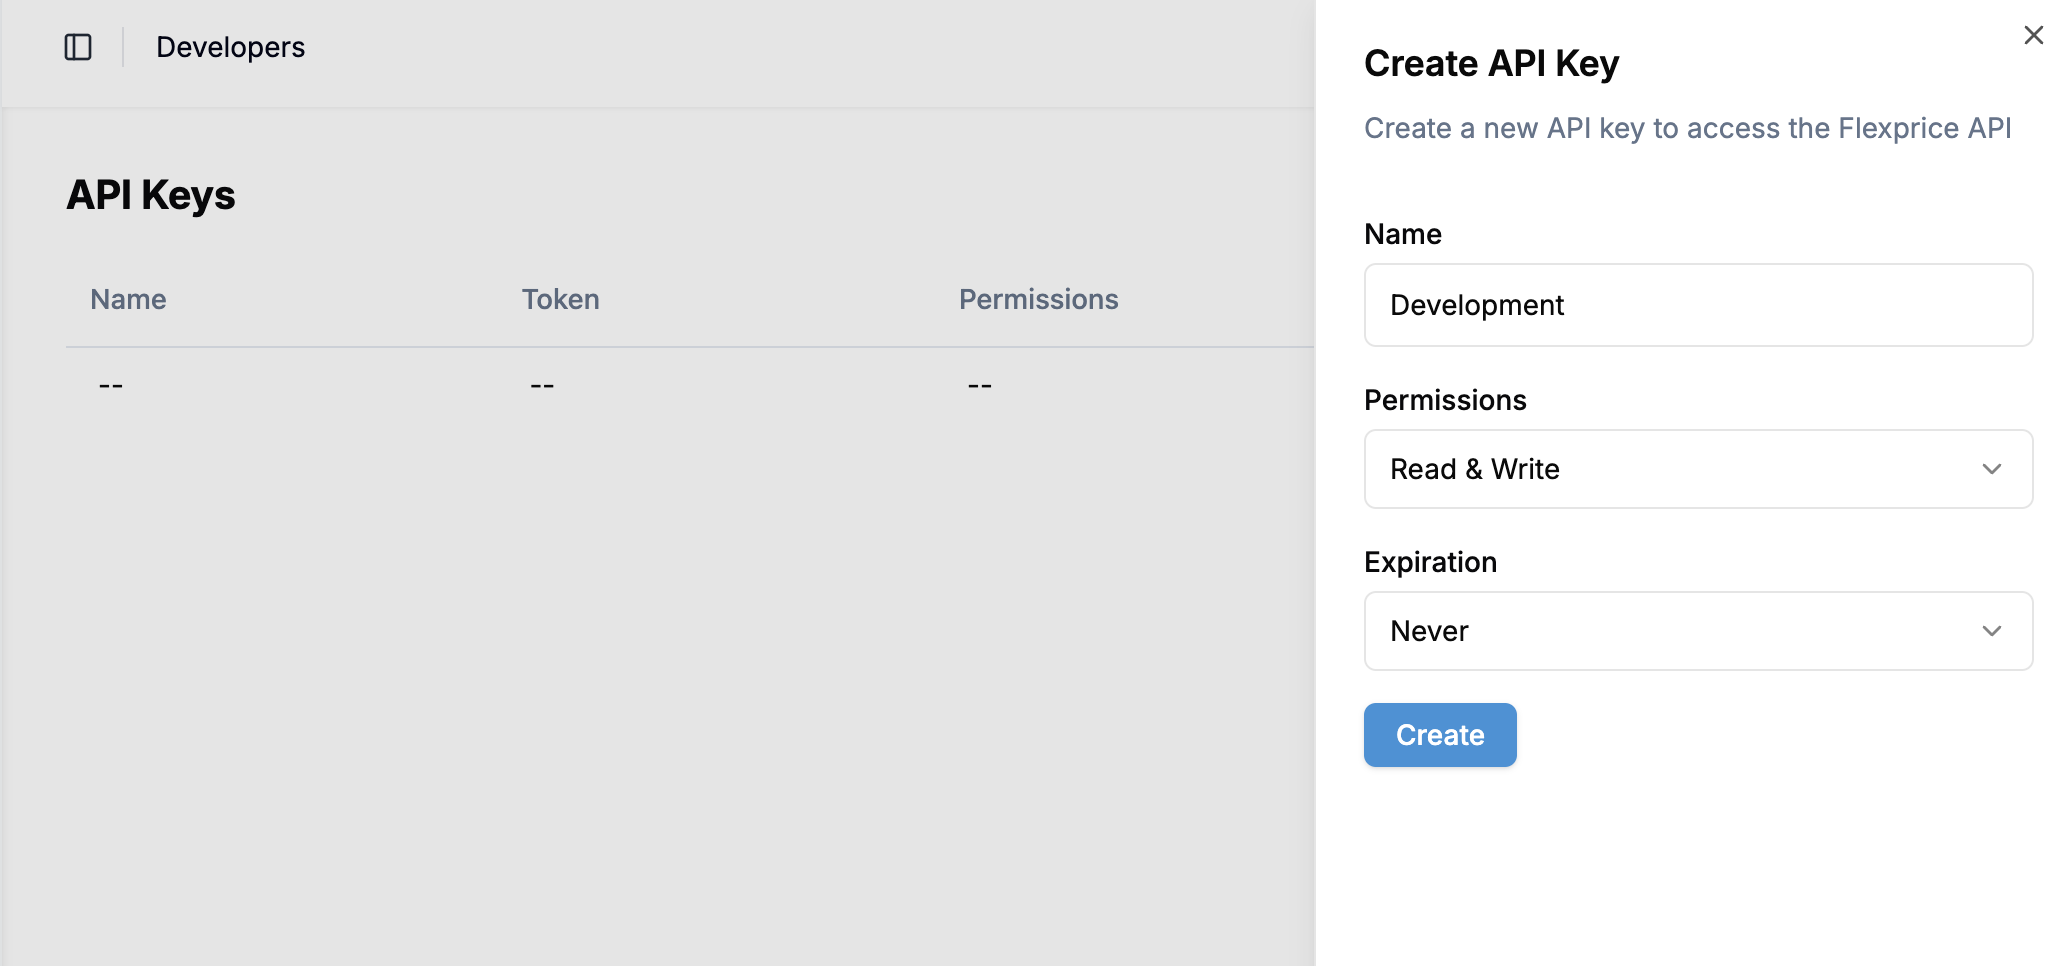 3. Configure your key:
* **Name**: Give it a descriptive name (e.g., "Development")
* **Permissions**: Select "Read & Write"
* **Expiration**: Choose "Never" for long-term use
4. Click **Create**
3. Configure your key:
* **Name**: Give it a descriptive name (e.g., "Development")
* **Permissions**: Select "Read & Write"
* **Expiration**: Choose "Never" for long-term use
4. Click **Create**
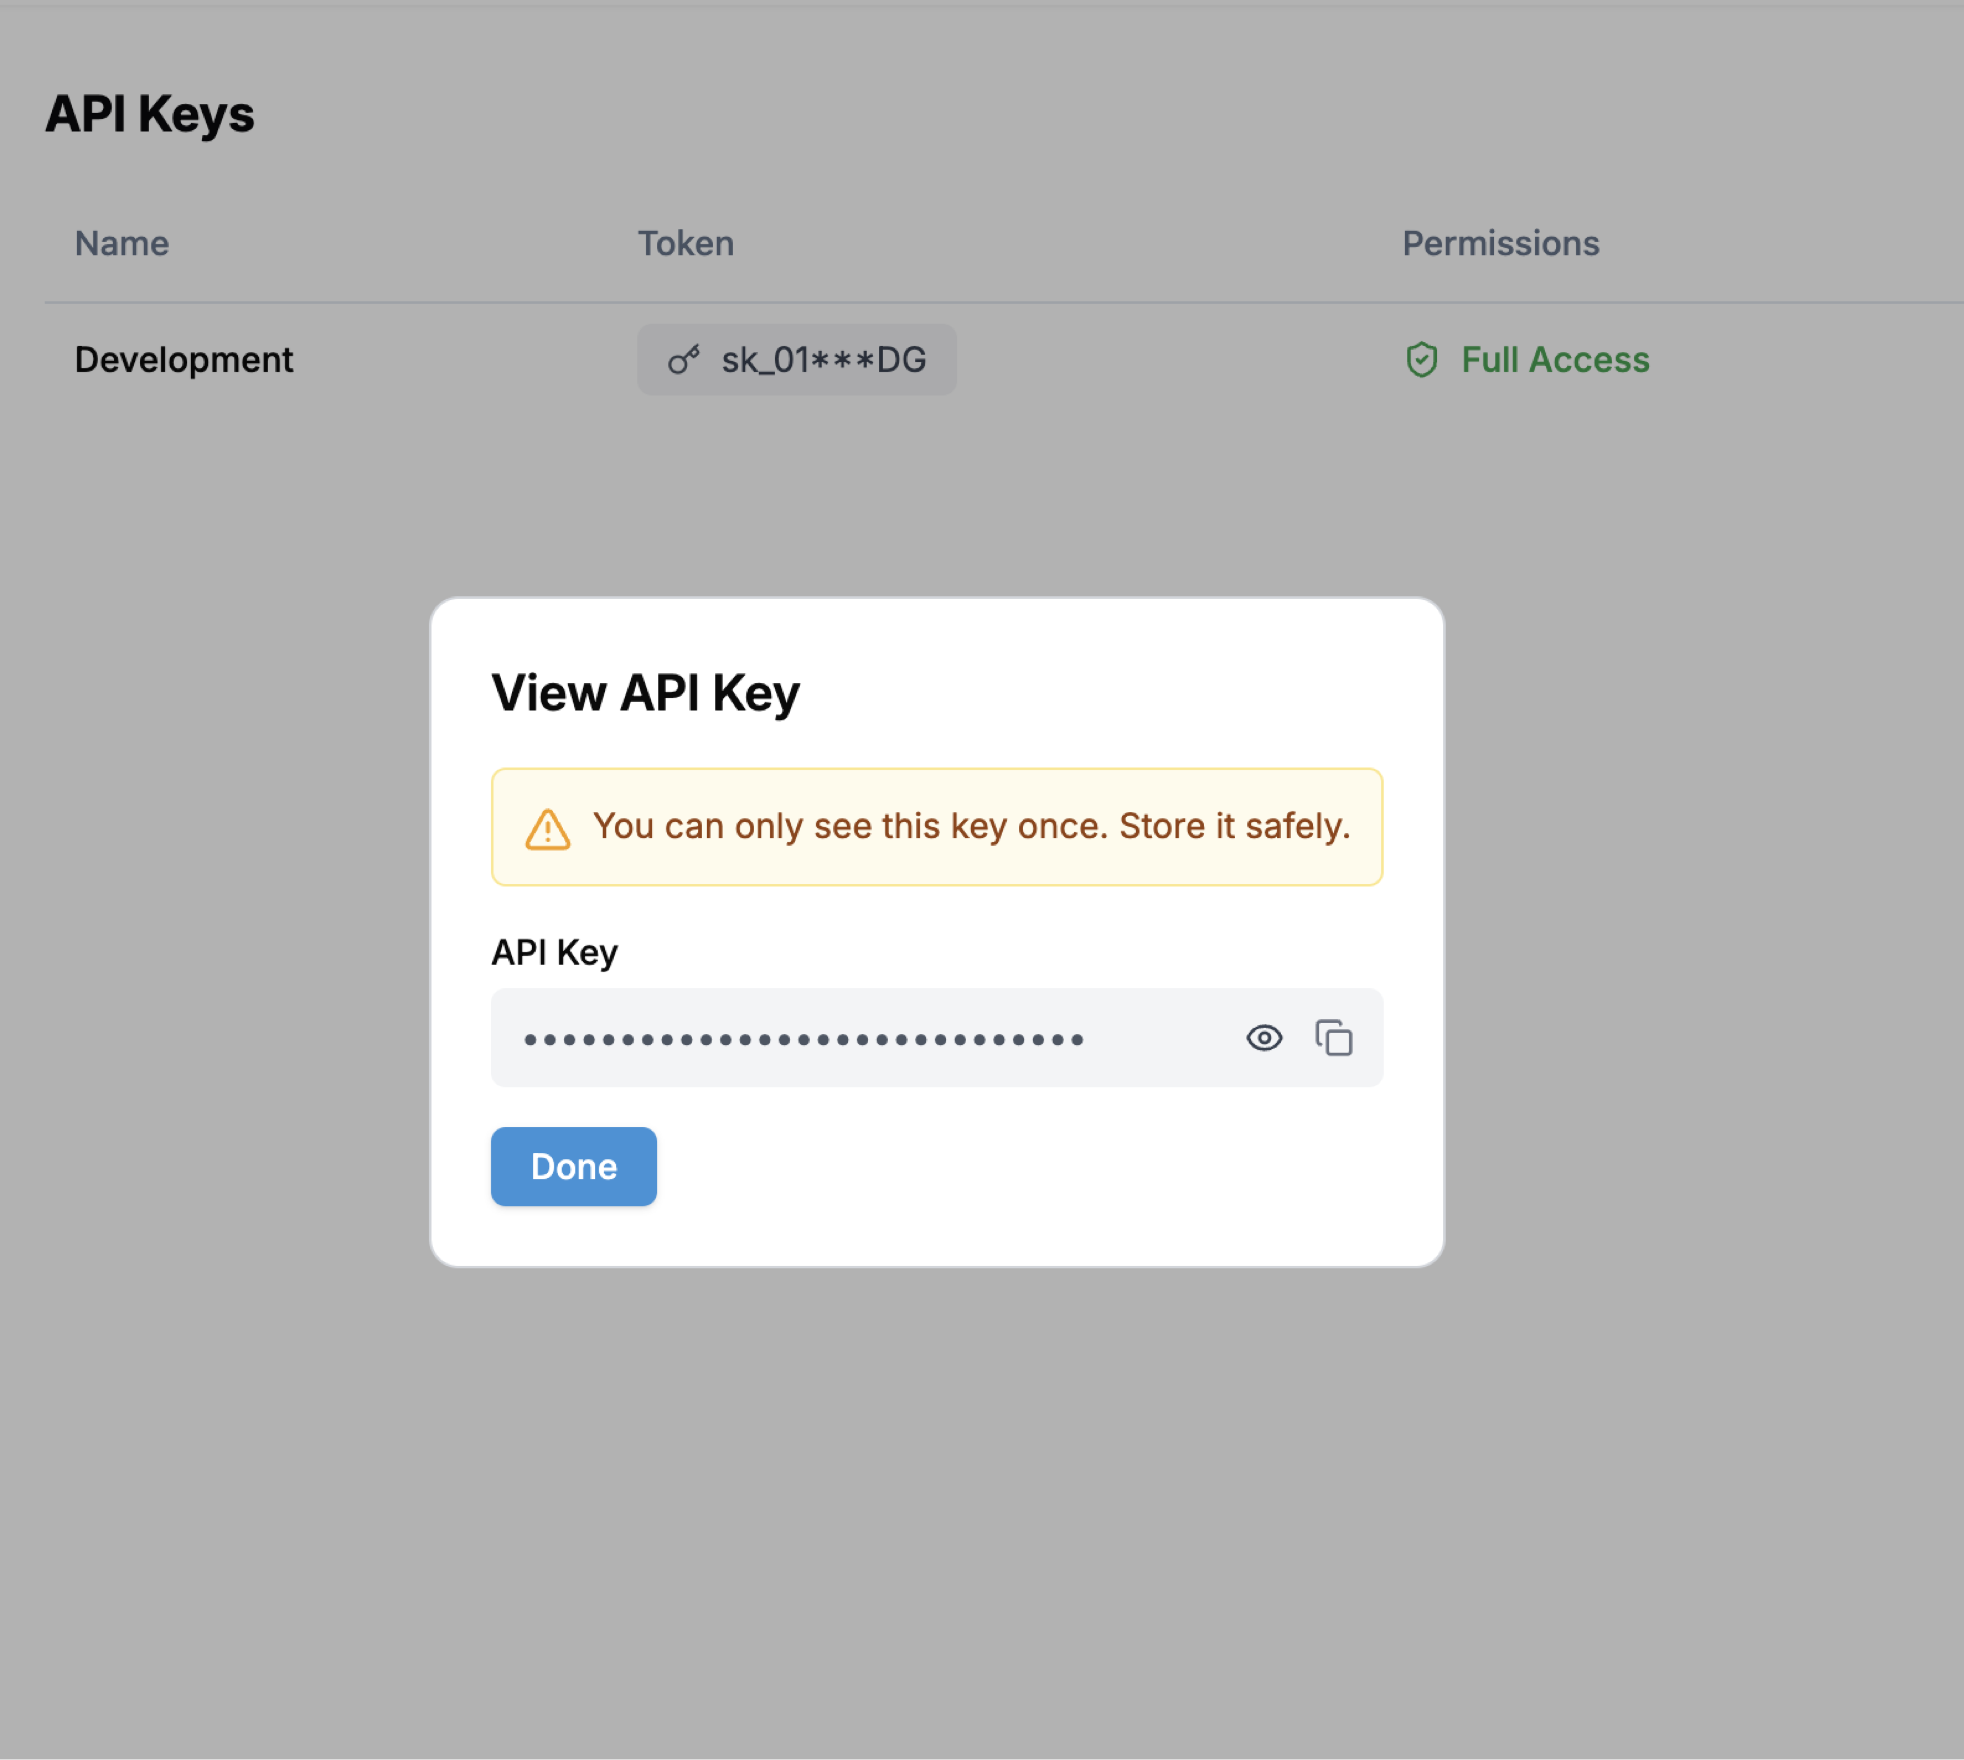 5. **Important**: Copy your API key immediately - it will only be shown once!
### Using Your API Key
Include your API key in all requests to Flexprice API:
```bash theme={null}
curl -X POST https://api.cloud.flexprice.io/v1/customers \
-H "x-api-key: YOUR_API_KEY" \
-H "Content-Type: application/json" \
-d '{"name": "Example Customer", "external_id": ""}'
```
Keep your API key secure and never expose it in client-side code or public repositories.
## Need Help?
If you need assistance or have questions:
* Email us at [support@flexprice.io](mailto:support@flexprice.io)
5. **Important**: Copy your API key immediately - it will only be shown once!
### Using Your API Key
Include your API key in all requests to Flexprice API:
```bash theme={null}
curl -X POST https://api.cloud.flexprice.io/v1/customers \
-H "x-api-key: YOUR_API_KEY" \
-H "Content-Type: application/json" \
-d '{"name": "Example Customer", "external_id": ""}'
```
Keep your API key secure and never expose it in client-side code or public repositories.
## Need Help?
If you need assistance or have questions:
* Email us at [support@flexprice.io](mailto:support@flexprice.io)