

Overview
A Razorpay connection in Flexprice stores encrypted credentials that allow the system to interact with your Razorpay account for:- Creating customers in Razorpay
- Processing payment links via Razorpay Checkout
- Receiving webhook notifications from Razorpay
- Synchronizing customer data between systems
- Syncing invoices to Razorpay for payment collection
Prerequisites
Before setting up your Razorpay connection, ensure you have:- Active Razorpay Account - Sign up at razorpay.com
- API Keys - Available in your Razorpay Dashboard
- Webhook Endpoint - Configured in Razorpay Dashboard
- Flexprice Environment - Valid tenant and environment IDs
Step 1: Gather Razorpay Credentials
Required Credentials
| Credential | Location in Razorpay Dashboard | Required | Purpose |
|---|---|---|---|
| Key ID | Settings → API Keys | ✅ | API authentication |
| Secret Key | Settings → API Keys | ✅ | API authentication |
| Webhook Secret | Settings → Webhooks → [Your Endpoint] | ✅ | Webhook signature verification |
Finding Your Credentials
-
API Keys:
- Go to Razorpay Dashboard → Settings → API Keys
- Copy your
Key ID - Copy your
Secret Key - Use test keys for development
-
Webhook Secret:
- Go to Razorpay Dashboard → Settings → Webhooks
- Create or select your webhook endpoint
- Copy the webhook secret (used for signature verification)
Step 2: Configure Webhook Endpoint in Razorpay
Webhook URL Format
Required Webhook Events
Configure these events in your Razorpay webhook endpoint:| Event Type | Purpose |
|---|---|
payment.captured | Track successful payment completions |
payment.failed | Handle payment failures and errors |
payment_link.paid | Required for Checkout Sessions — triggers subscription activation |
payment_link.cancelled | Required for Checkout Sessions — triggers draft entity cleanup |
payment_link.expired | Required for Checkout Sessions — triggers draft entity cleanup |
The
payment_link.* events are required if you use Flexprice Checkout Sessions. Without them, subscriptions created via Checkout will remain in draft status after payment. If you only use manual invoice payment links (not Checkout Sessions), these three events are optional.Setting Up the Webhook
- Go to Razorpay Dashboard → Settings → Webhooks
- Click + Add New Webhook
- Enter your webhook URL
- Select the required events listed above
- Click Create Webhook
- Copy the Webhook Secret for your connection
Step 3: Create Razorpay Connection
Using Flexprice Dashboard
You can create a Razorpay connection directly from the Flexprice dashboard: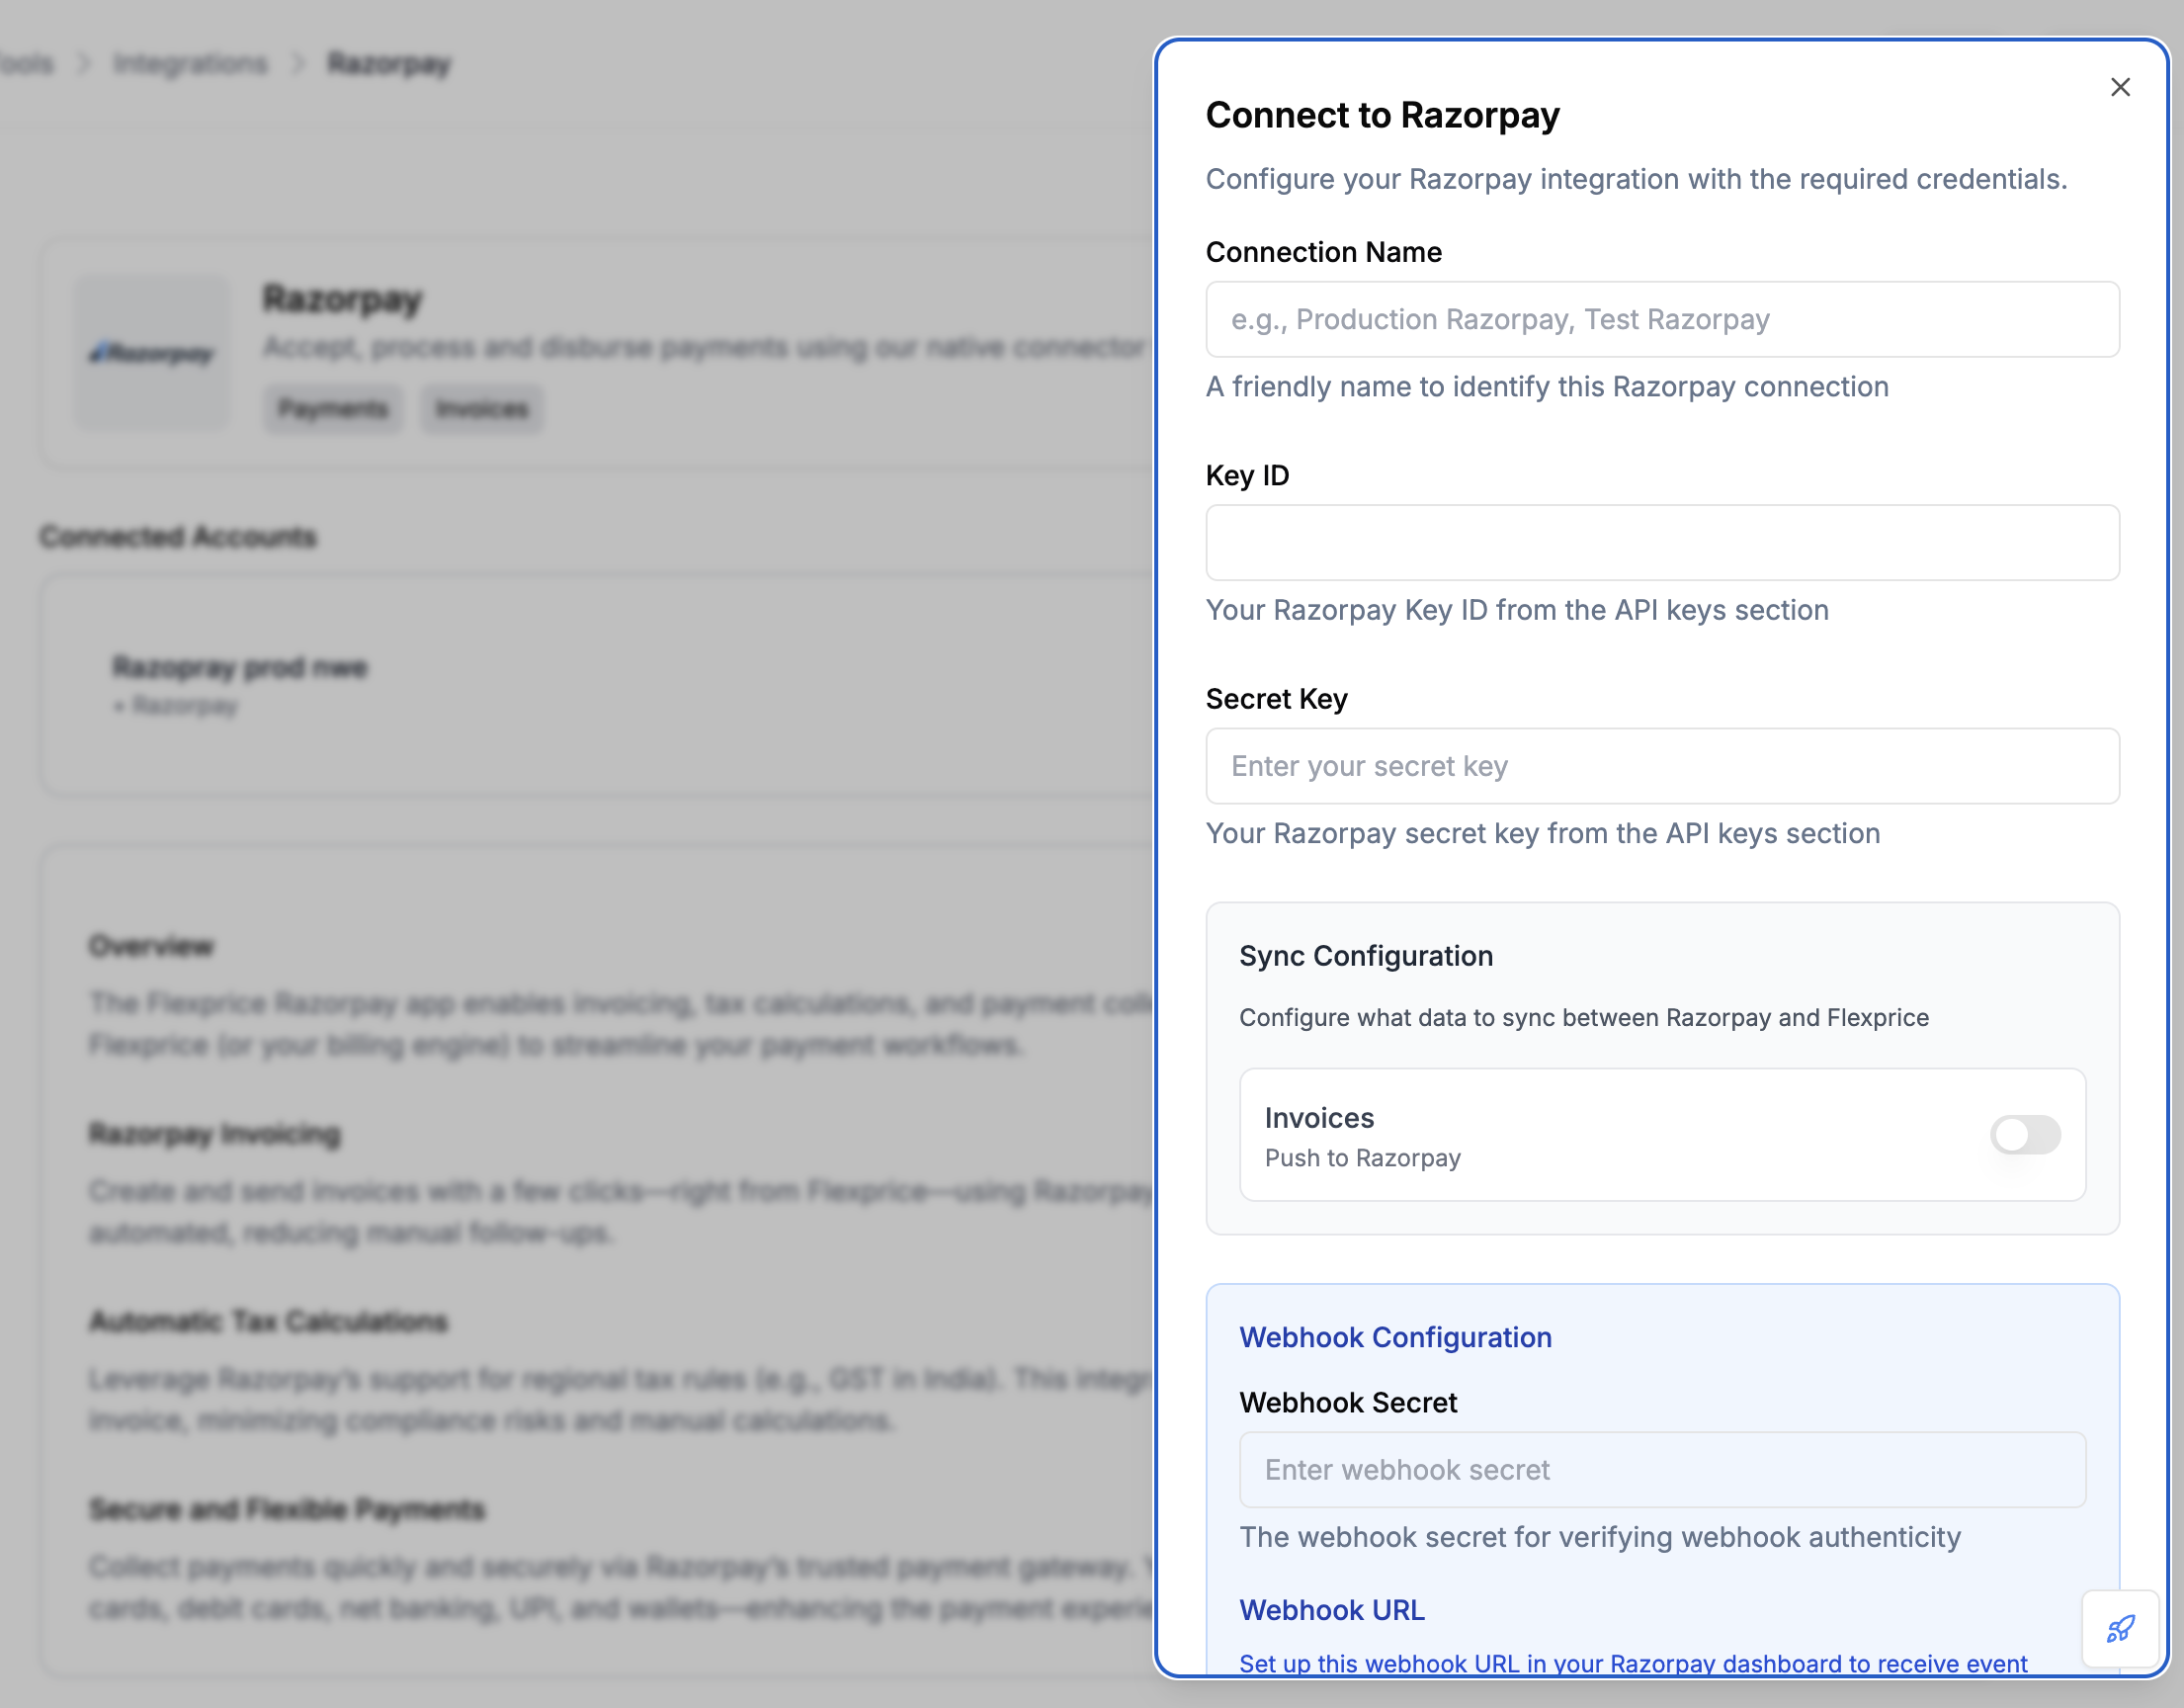
Webhook Configuration
After creating the connection, configure webhooks in the connection settings: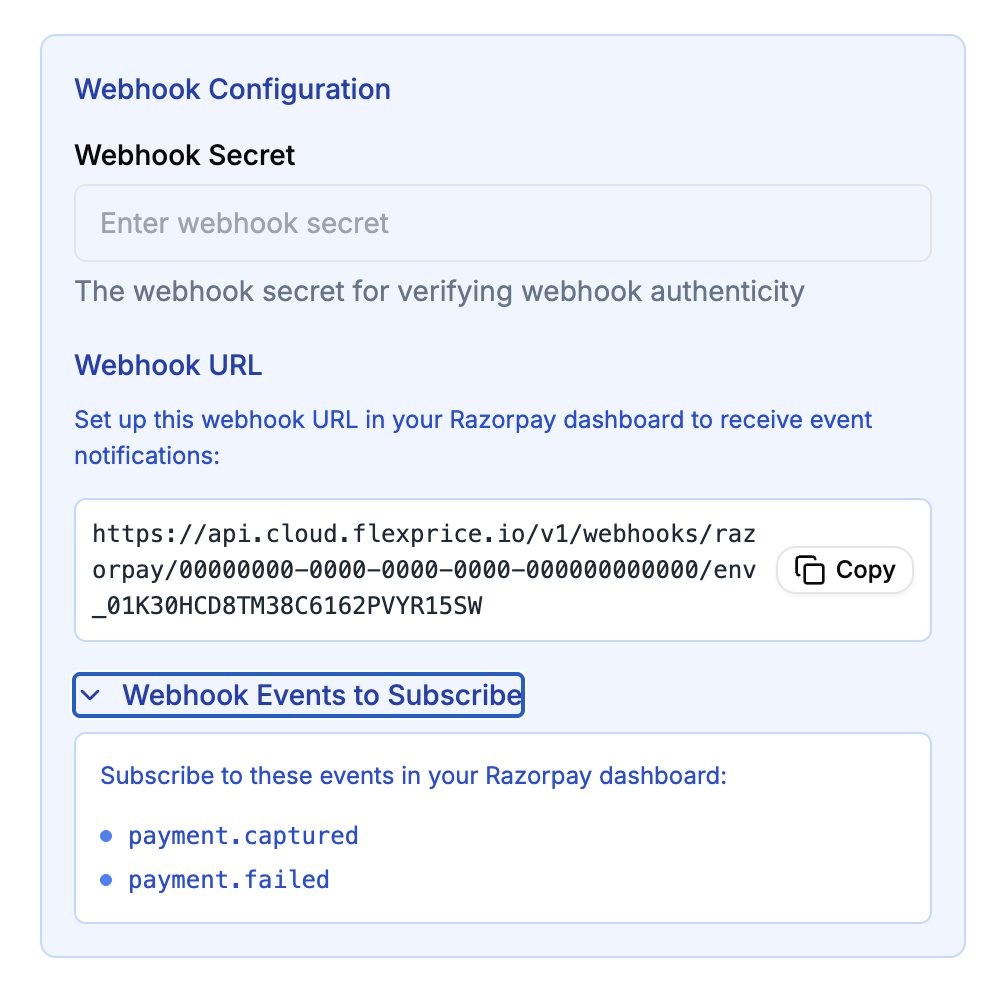
API Request
API Request
Endpoint:POST /api/v1/connections
Headers:
Response
Security Best Practices
Credential Management
- Environment Separation: Use different keys for test/production
- Key Rotation: Regularly rotate your Razorpay API keys
- Access Control: Limit API key permissions in Razorpay
- Encryption: All credentials are encrypted at rest in Flexprice
Webhook Security
- HTTPS Only: Always use HTTPS for webhook endpoints
- Signature Verification: Flexprice verifies all webhook signatures
- Secret Management: Keep webhook secrets secure and rotate regularly
- Rate Limiting: Implement rate limiting on webhook endpoints
Troubleshooting
Common Issues
| Issue | Cause | Solution |
|---|---|---|
| Connection test fails | Invalid API keys | Verify keys in Razorpay Dashboard |
| Webhook not received | Incorrect webhook URL | Check URL format and endpoint |
| Signature verification fails | Wrong webhook secret | Update webhook secret in connection |
| Customer sync fails | Missing account permissions | Check Razorpay account permissions |
Debug Steps
- Check Razorpay Dashboard: Verify API keys and webhook configuration
- Test API Keys: Use Razorpay API to test key validity
- Monitor Webhooks: Check webhook delivery logs in Razorpay
- Review Logs: Check Flexprice application logs for errors
Next Steps
After setting up your Razorpay connection:- Test Customer Sync: Create a test customer and sync to Razorpay
- Create Payment Links: Test payment link creation and flow
- Monitor Webhooks: Ensure webhook events are being received
- Go Live: Switch to production keys when ready