

Overview
A Nomod connection in Flexprice lets you:- Sync customers from Flexprice to Nomod
- Sync invoices from Flexprice to Nomod
- Create payment links for invoices so customers can pay via Nomod
- Receive payment (e.g. link paid, invoice paid) in Flexprice
- Process payments through Nomod’s secure checkout
Prerequisites
Before you start, have:- Nomod account – Nomod app (Play Store / App Store)
- Flexprice account – https://flexprice.io/
Keys you need
Create Nomod Connection
Using Flexprice Dashboard
Go to Flexprice dashboard → Integrations → Nomod → Add a connection.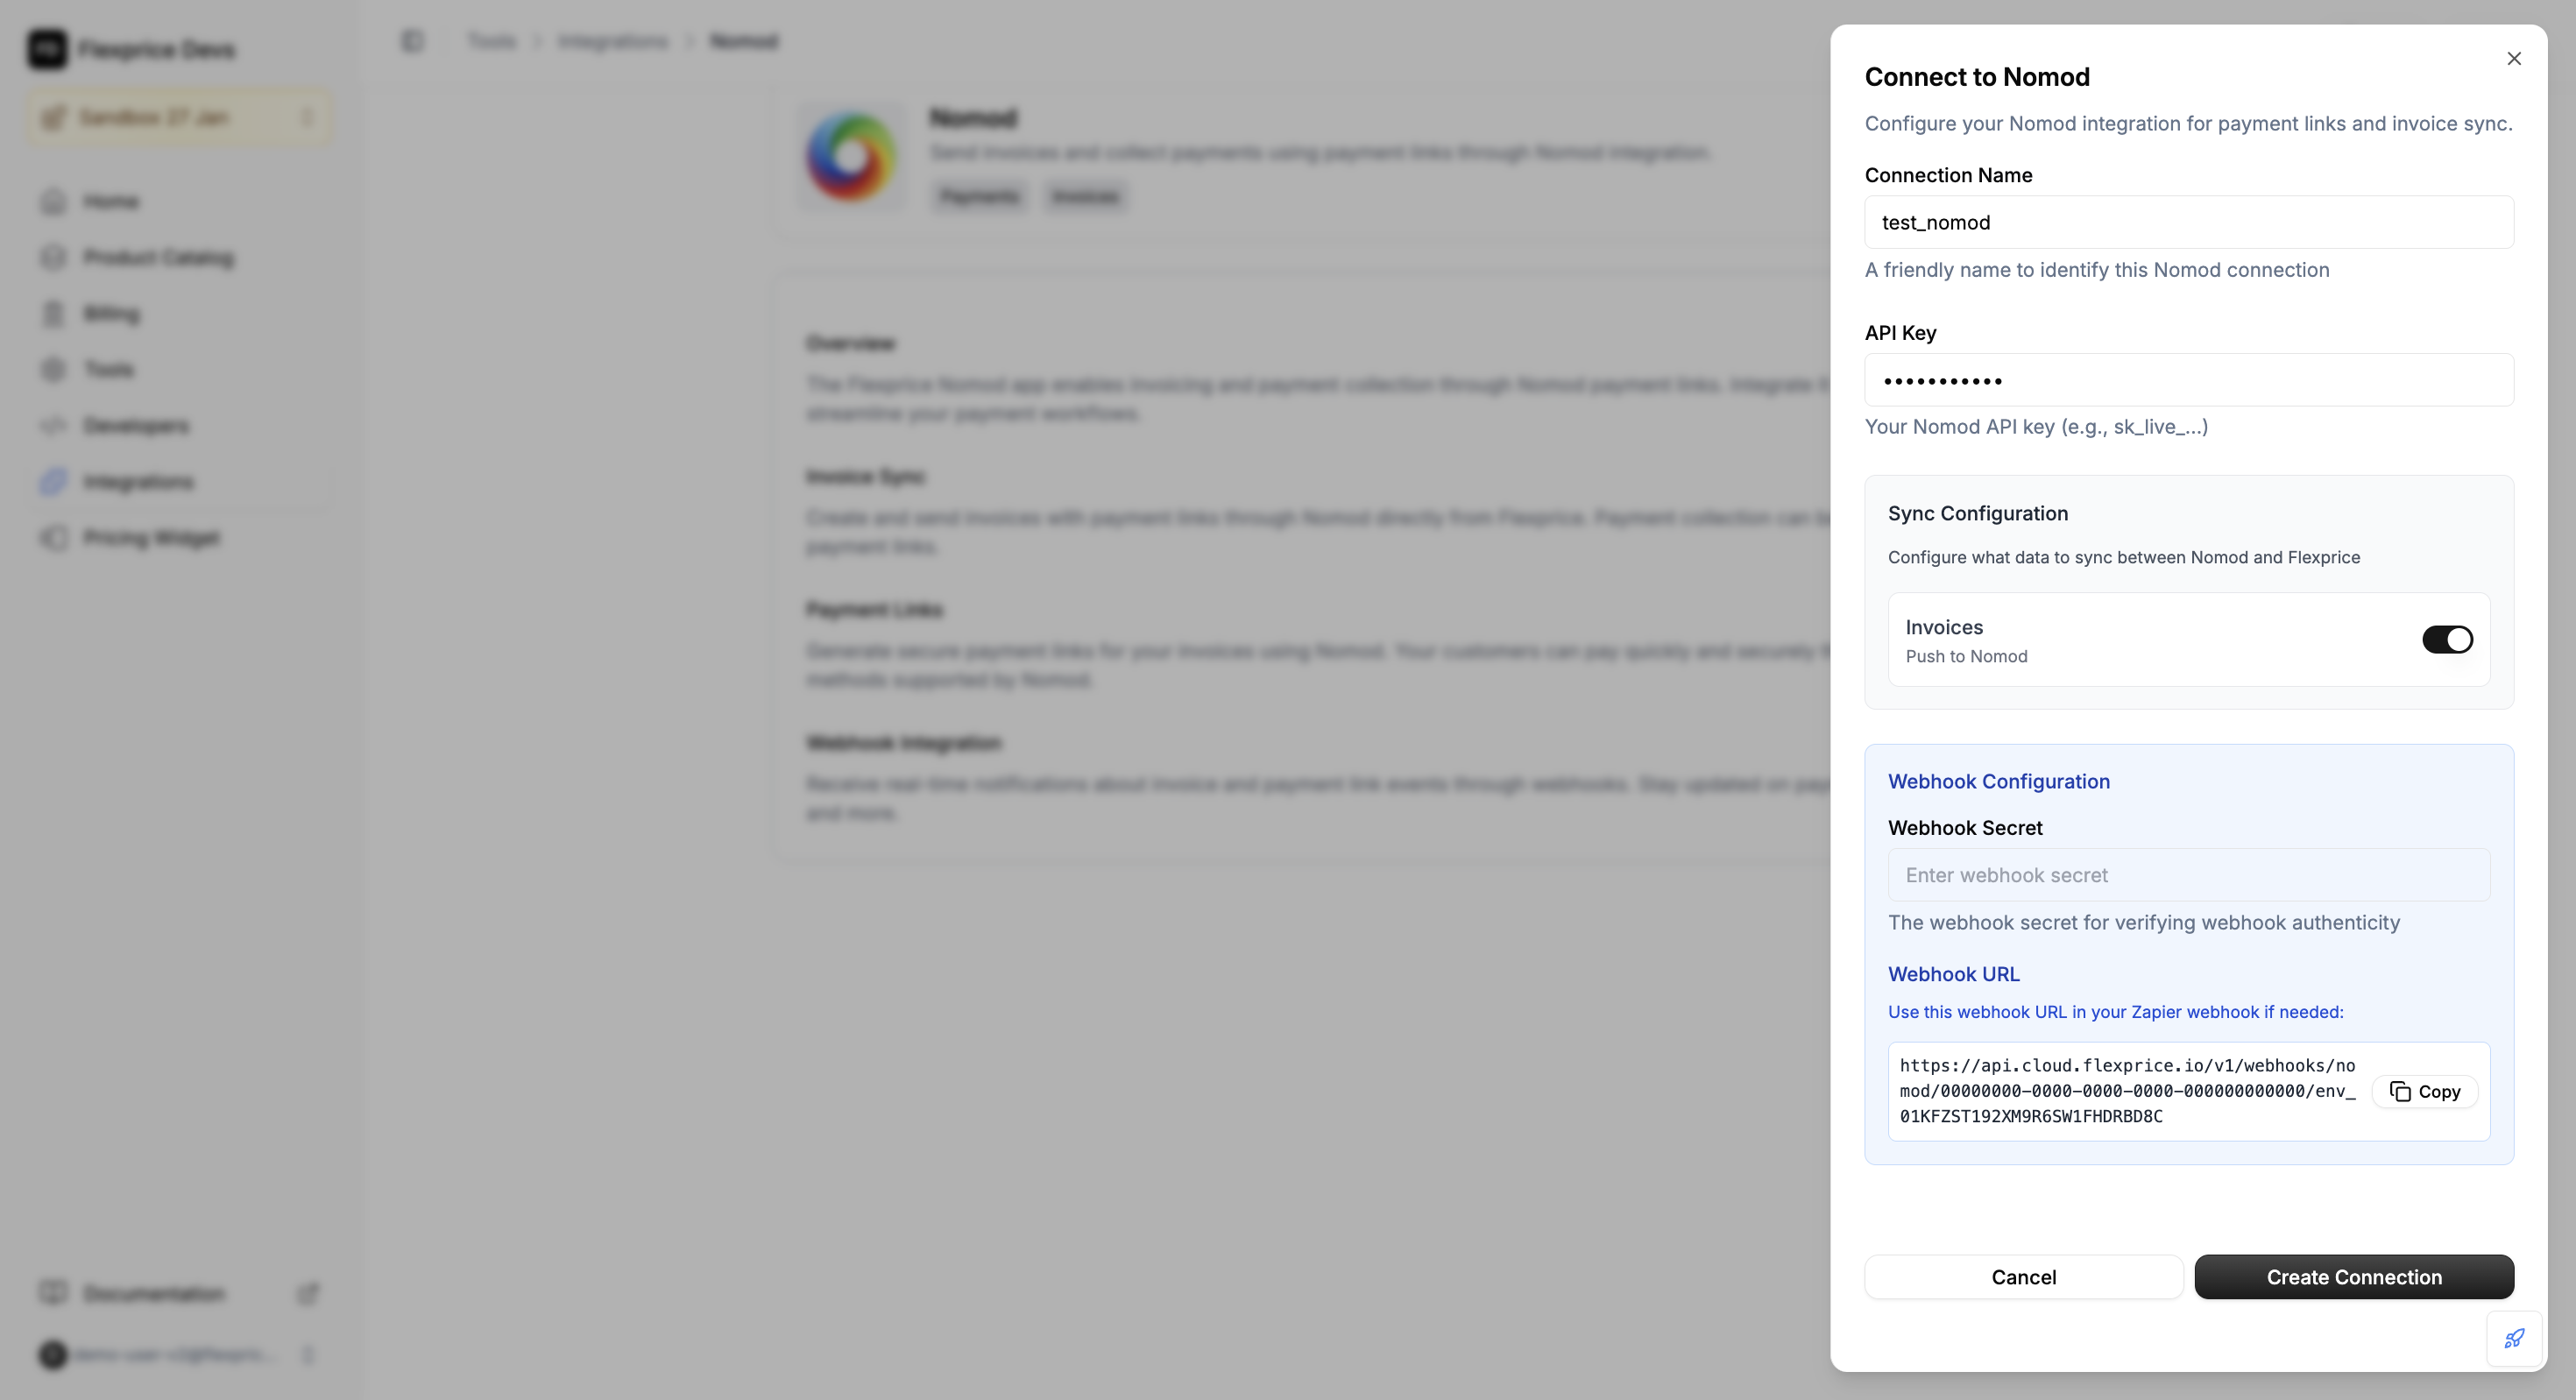
Setup at a glance
1
Set up connection name
Choose a name for this Nomod connection so you can identify it in Flexprice.
2
Get your Nomod API key
Get your Nomod API key from the Nomod app (Connect and Manage Integrations).
3
Invoice sync (outbound)
Invoice sync = true means Flexprice pushes invoices to Nomod.Invoice sync = false means Flexprice does not push invoices to Nomod (invoices stay only in Flexprice).
4
Set up webhook secret
Use any secure random name or string for webhook verification and provide it to the Flexprice team as well.
Why Zapier?
1
Nomod does not support webhooks
Nomod does not support webhooks directly.
2
Zapier has a pre-made Nomod app for webhooks
Zapier offers a pre-built Nomod app for webhook events.
3
Provide the Zapier API key and webhook secret
Provide your Zapier API key and webhook secret to Flexprice so it can receive Nomod events (e.g. Link Paid, Invoice Paid).
4
Flexprice creates the Zapier connection
Flexprice creates and manages the Zapier connection for you. Contact the Flexprice team to set up the Zapier Zap and webhook configuration.
Configure Connection Settings
Editing a Connection
1
Navigate to Integration Page
Navigate to the Nomod integration page
2
Find Connection
Find your connection in the “Connected Accounts” list
3
Edit Connection
Click the edit icon (pencil)
4
Modify Settings
Modify settings as needed
5
Save Changes
Click “Update Connection”
Deleting a Connection
1
Navigate to Integration Page
Navigate to the Nomod integration page
2
Find Connection
Find your connection in the “Connected Accounts” list
3
Delete Connection
Click the delete icon (trash) for the connection you want to remove.
4
Confirm Deletion
Confirm deletion in the dialog. The connection will be removed and Nomod payment processing for it will stop.
Security Best Practices
Credential Management
- Environment Separation: Use different keys for test/production
- Key Rotation: Regularly rotate your Nomod API keys
- Access Control: Limit API key permissions in Nomod
- Encryption: All credentials are encrypted at rest in Flexprice
Troubleshooting
Common Issues
Next steps
After your Nomod connection is set up:- Test payment links – Create a test payment link and confirm the flow works.
- Check events – Ensure your Zapier API key is correct and events reach Flexprice (Flexprice handles the Zapier integration).
- Enable invoice sync – If you want invoices pushed to Nomod, turn on Push to Nomod in the connection.
- Go live – When ready, switch to production keys in Nomod and Flexprice.