

What the Attio integration syncs
Flexprice does not sync plans, prices, or payment methods with Attio, and it does not read deals or invoices back from Attio. Attio has no quote object, so the Attio integration has no quote sync.
Before you connect Attio
- Attio admin access. Only workspace admins can create access tokens.
- The Deals object turned on in Attio. Attio turns off Deals in new workspaces. Customer sync and deal sync both work from deals. To turn it on, open Workspace settings → Objects and click Activate next to Deals.
- The Flexprice environment for the connection. The webhook that Flexprice registers in Attio carries the tenant and environment IDs of that environment, so create the connection in the environment you want customers to land in.
- A free object slot in your Attio plan, if you plan to use invoice sync. Flexprice records invoices in a custom object, which counts toward your plan’s object limit.
Step 1: Create an Attio access token
1
Open the developer settings
In Attio, click your workspace name at the top left, select Workspace settings, then select Developers in the settings sidebar. The Access tokens tab opens.
2
Create the token
Click Create access token. In the New access token dialog, enter a Name such as
Flexprice.3
Set the scopes
Each scope in the dialog has a dropdown set to Disabled. Set the scopes for the syncs you plan to use to the levels in the table below, then click Save.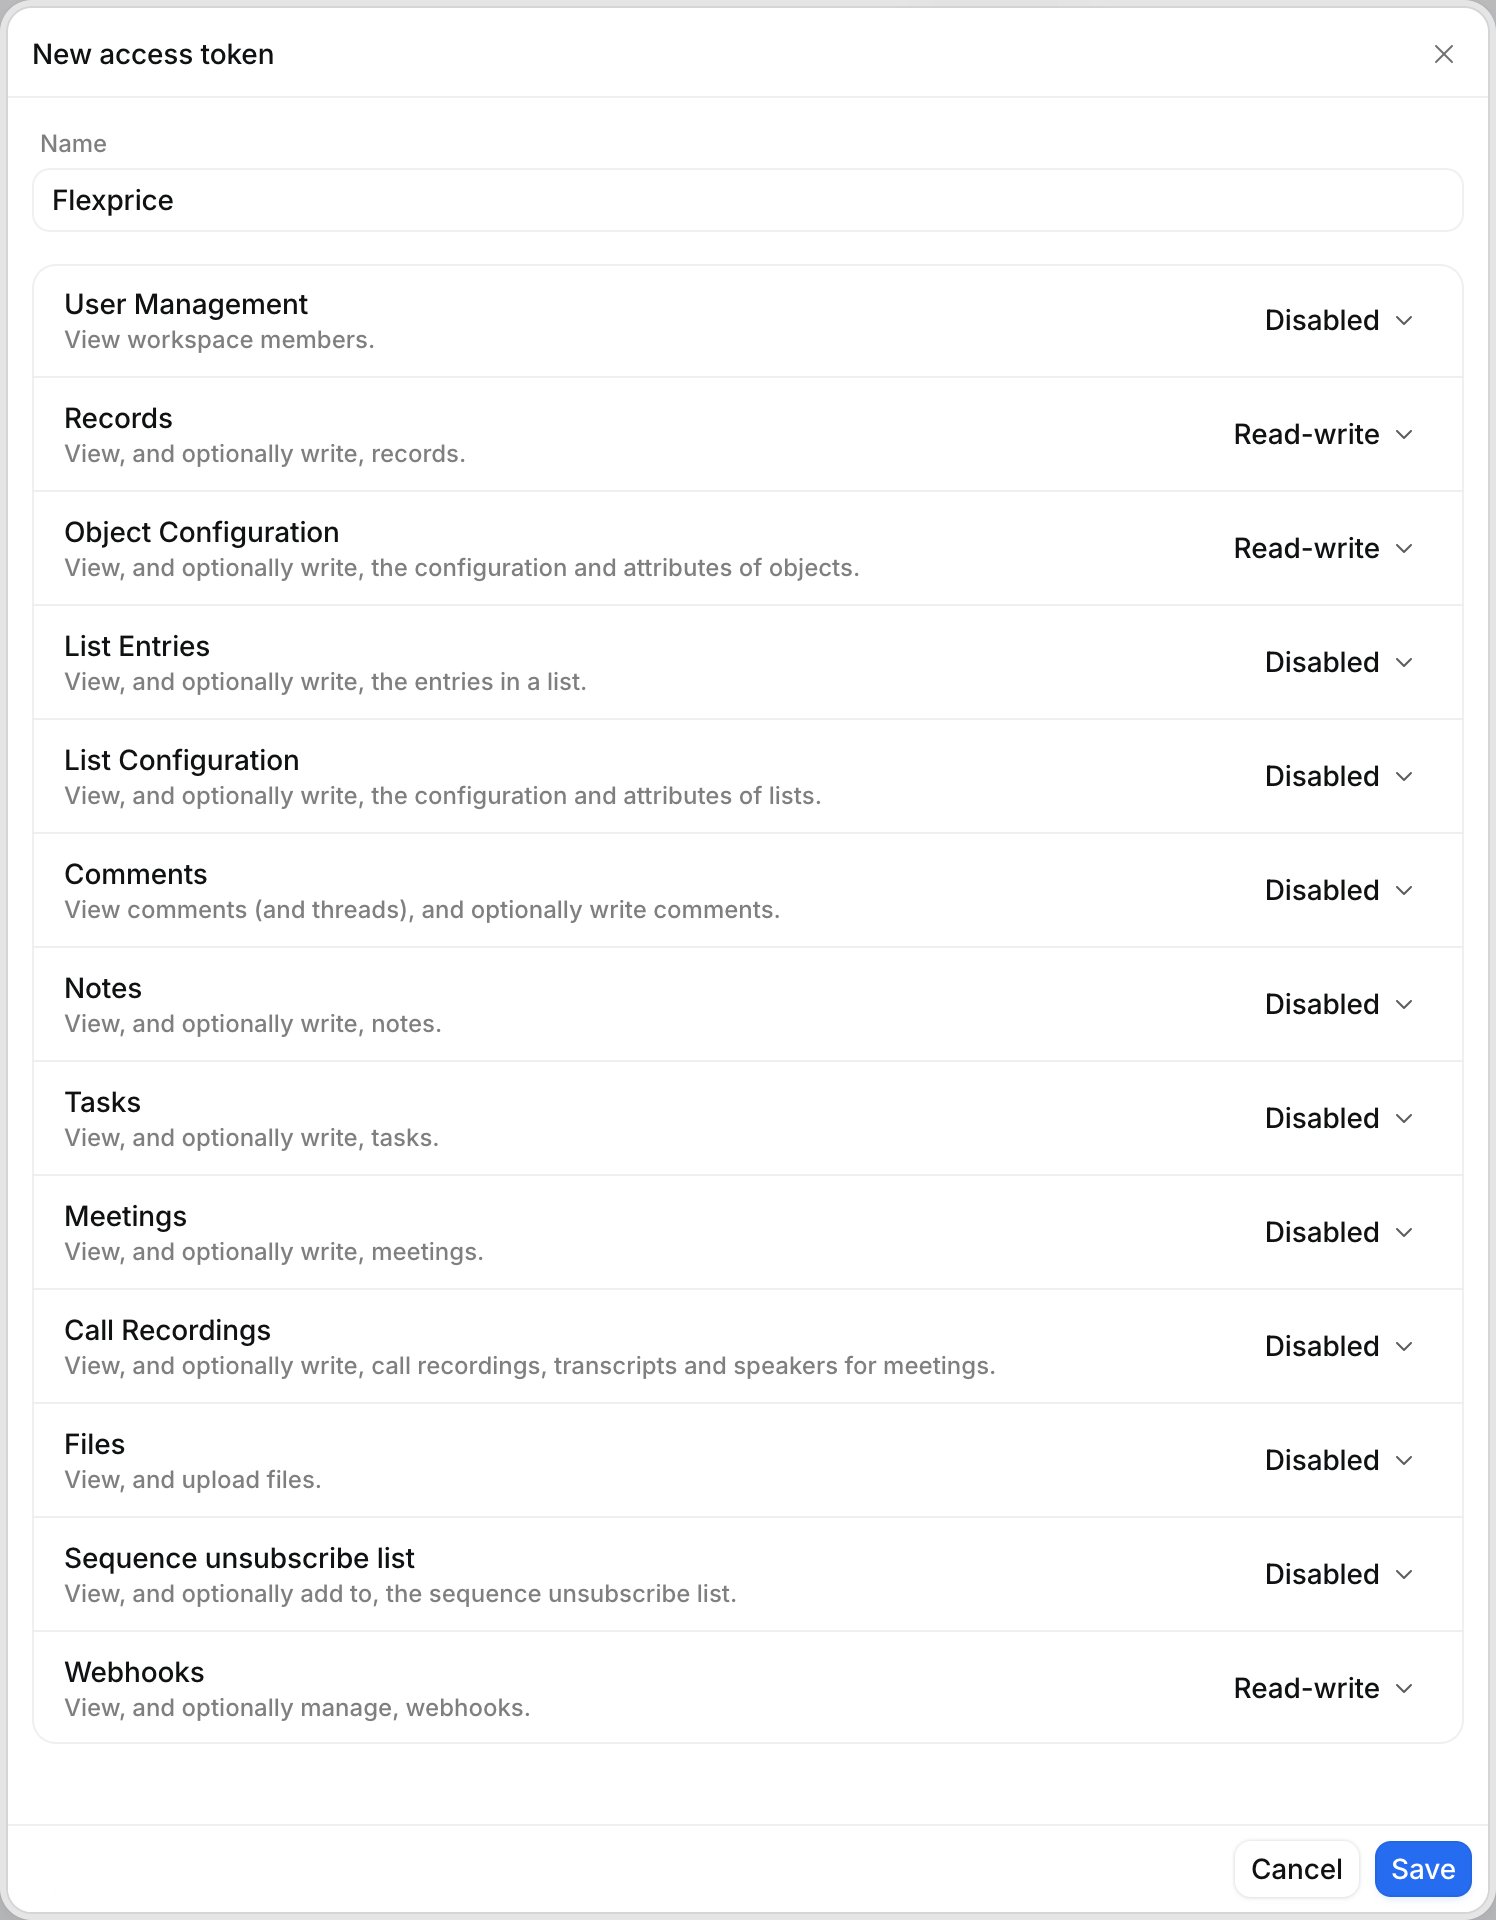
4
Copy the token
Copy the new token from the Access tokens tab. Attio tokens do not expire, so store the token like a password.
Attio scopes for each Flexprice sync
Leave every other scope at Disabled. In the API, these levels are the scopes
record_permission:read, record_permission:read-write, object_configuration:read, object_configuration:read-write, and webhook:read-write. Deal sync and invoice sync need Object Configuration at Read-write because Flexprice adds its own attributes to your Deals object and creates its own Flexprice Invoices object. Customer sync needs Webhooks at Read-write because Flexprice registers its webhook through the Attio API.
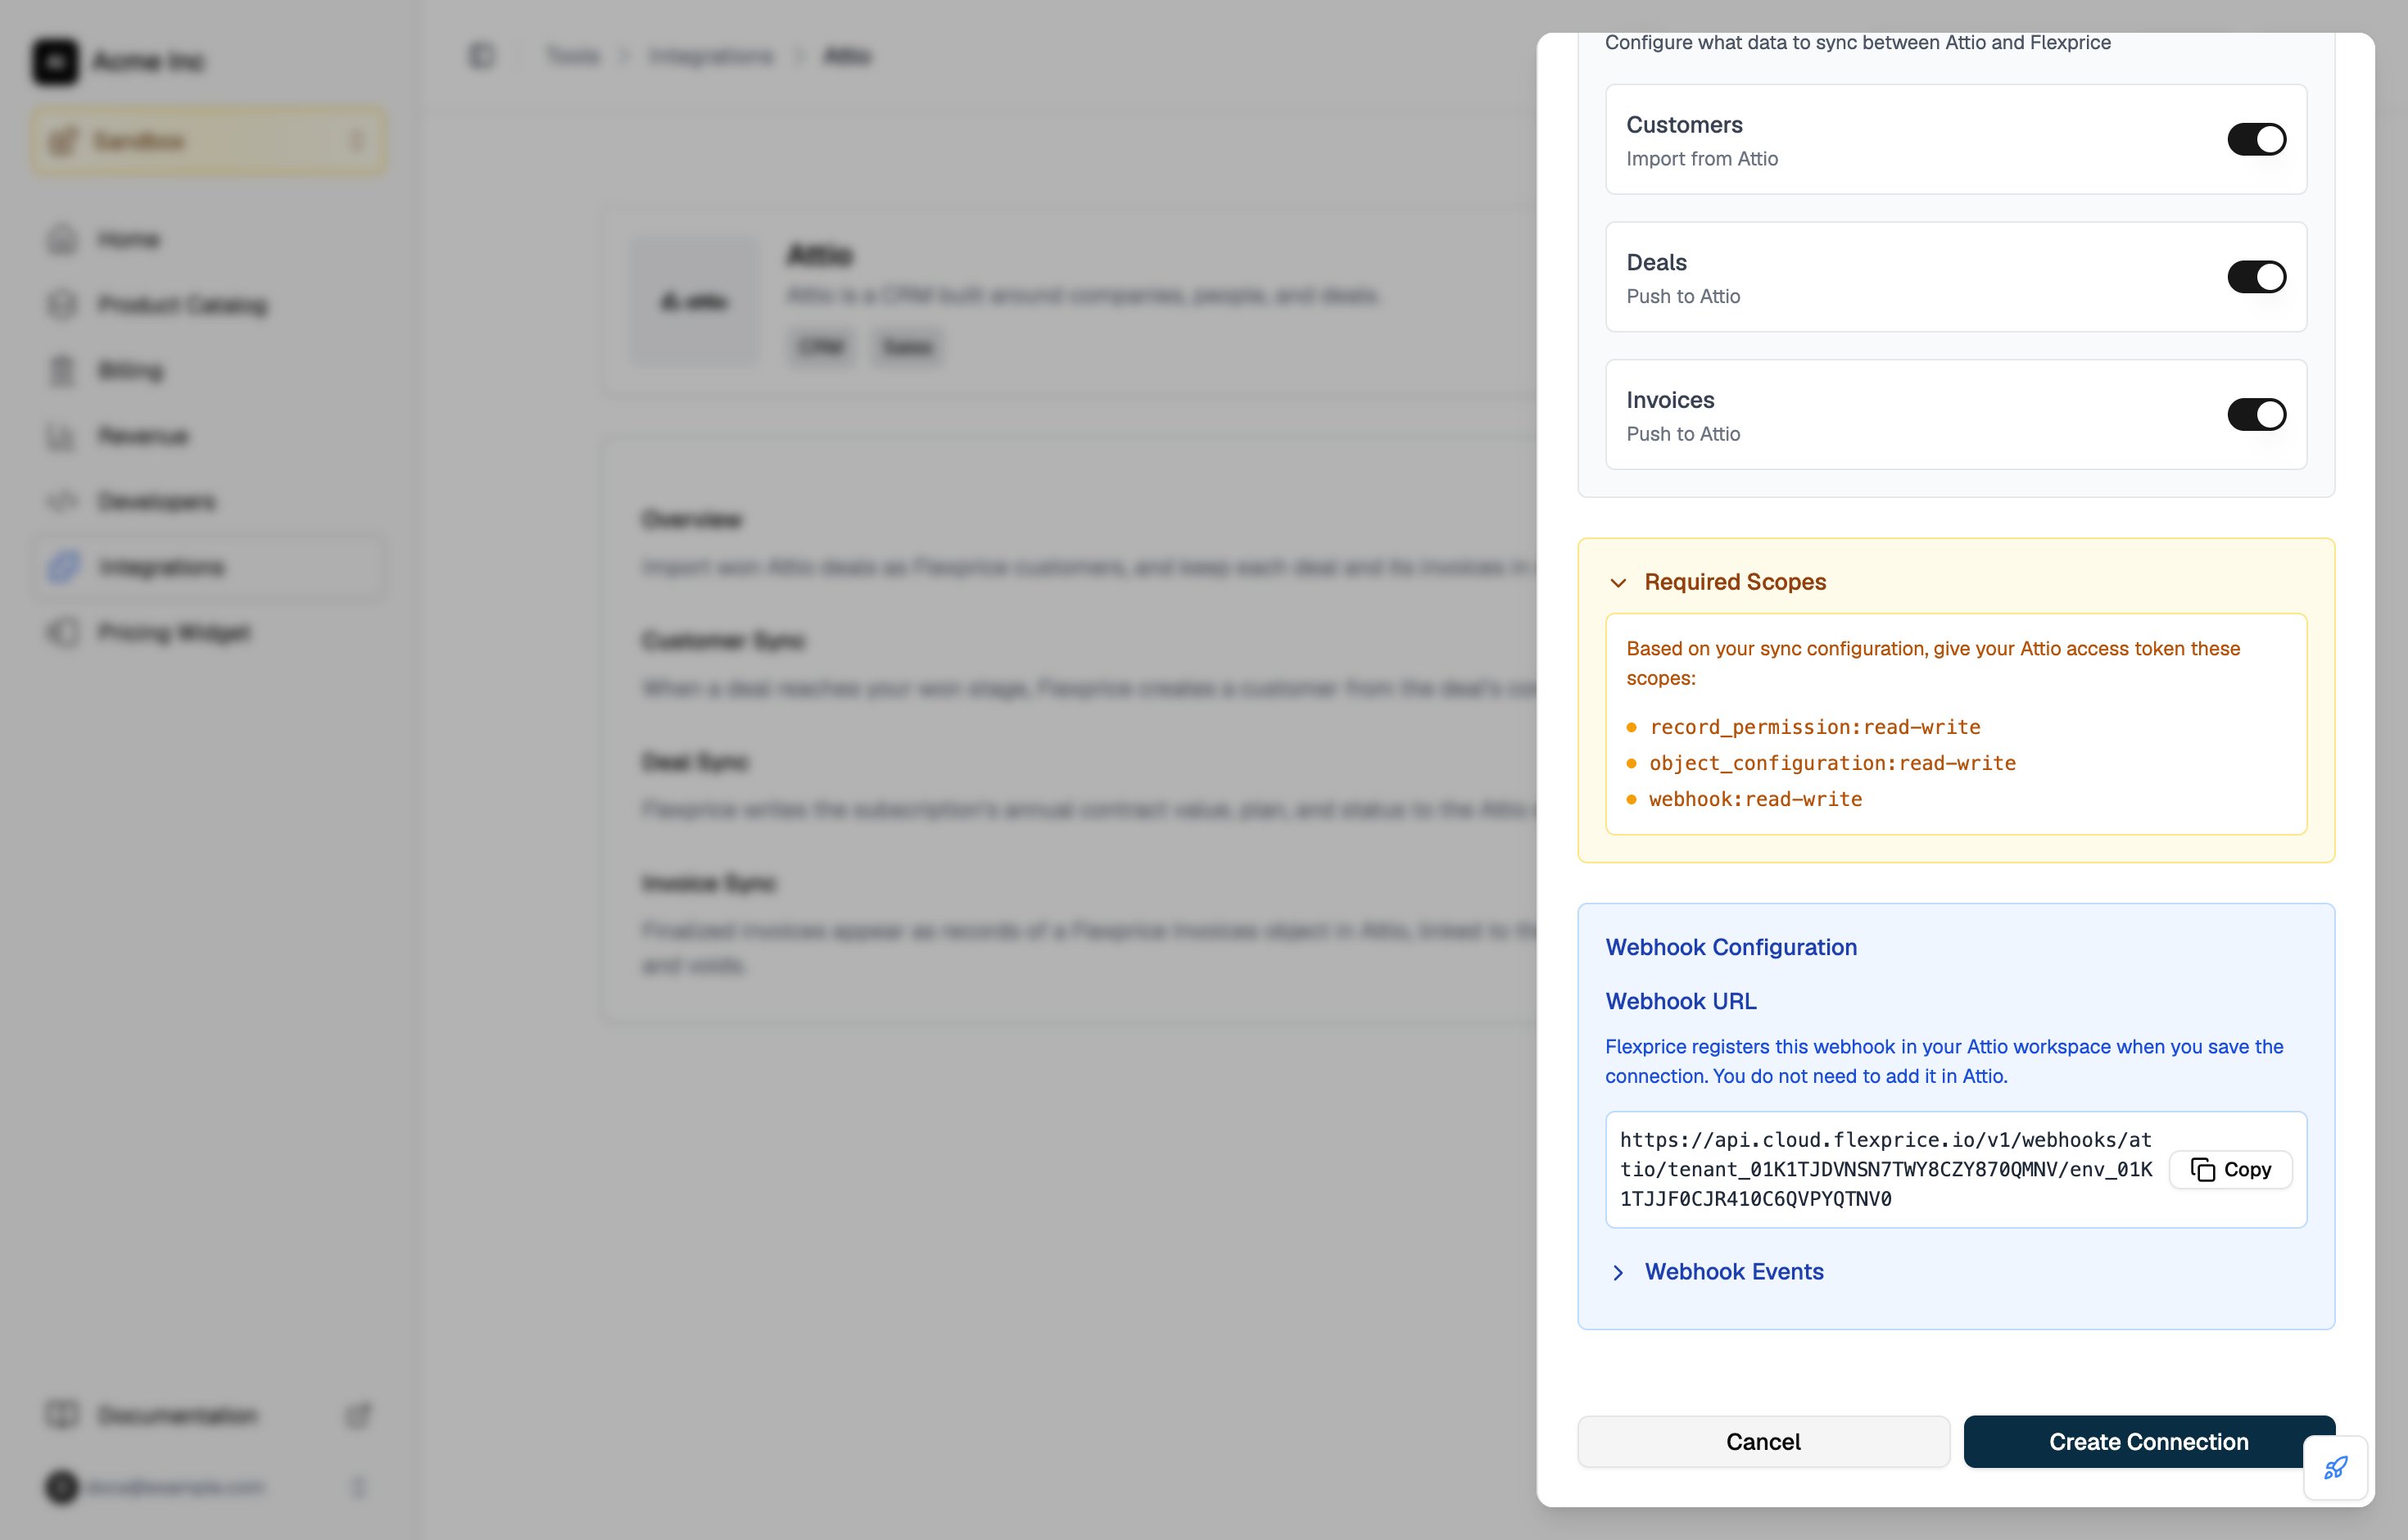
The Required Scopes panel in the Flexprice connection drawer lists the scopes for the syncs you turn on.
Step 2: Create the Attio connection in Flexprice
Connecting Attio from the Flexprice dashboard
1
Open the Attio integration
In the Flexprice dashboard, open Integrations, select Attio, and click Add a connection.
2
Enter the name and token
Fill in Connection Name, then paste the Access Token from Step 1.
3
Pick the won stage
Won Stage lists the stages of your Deals object. Pick the stage that marks a deal as won. It defaults to Won 🎉, the won stage Attio creates by default. Flexprice stores the stage’s ID, so renaming the stage in Attio later does not break customer sync.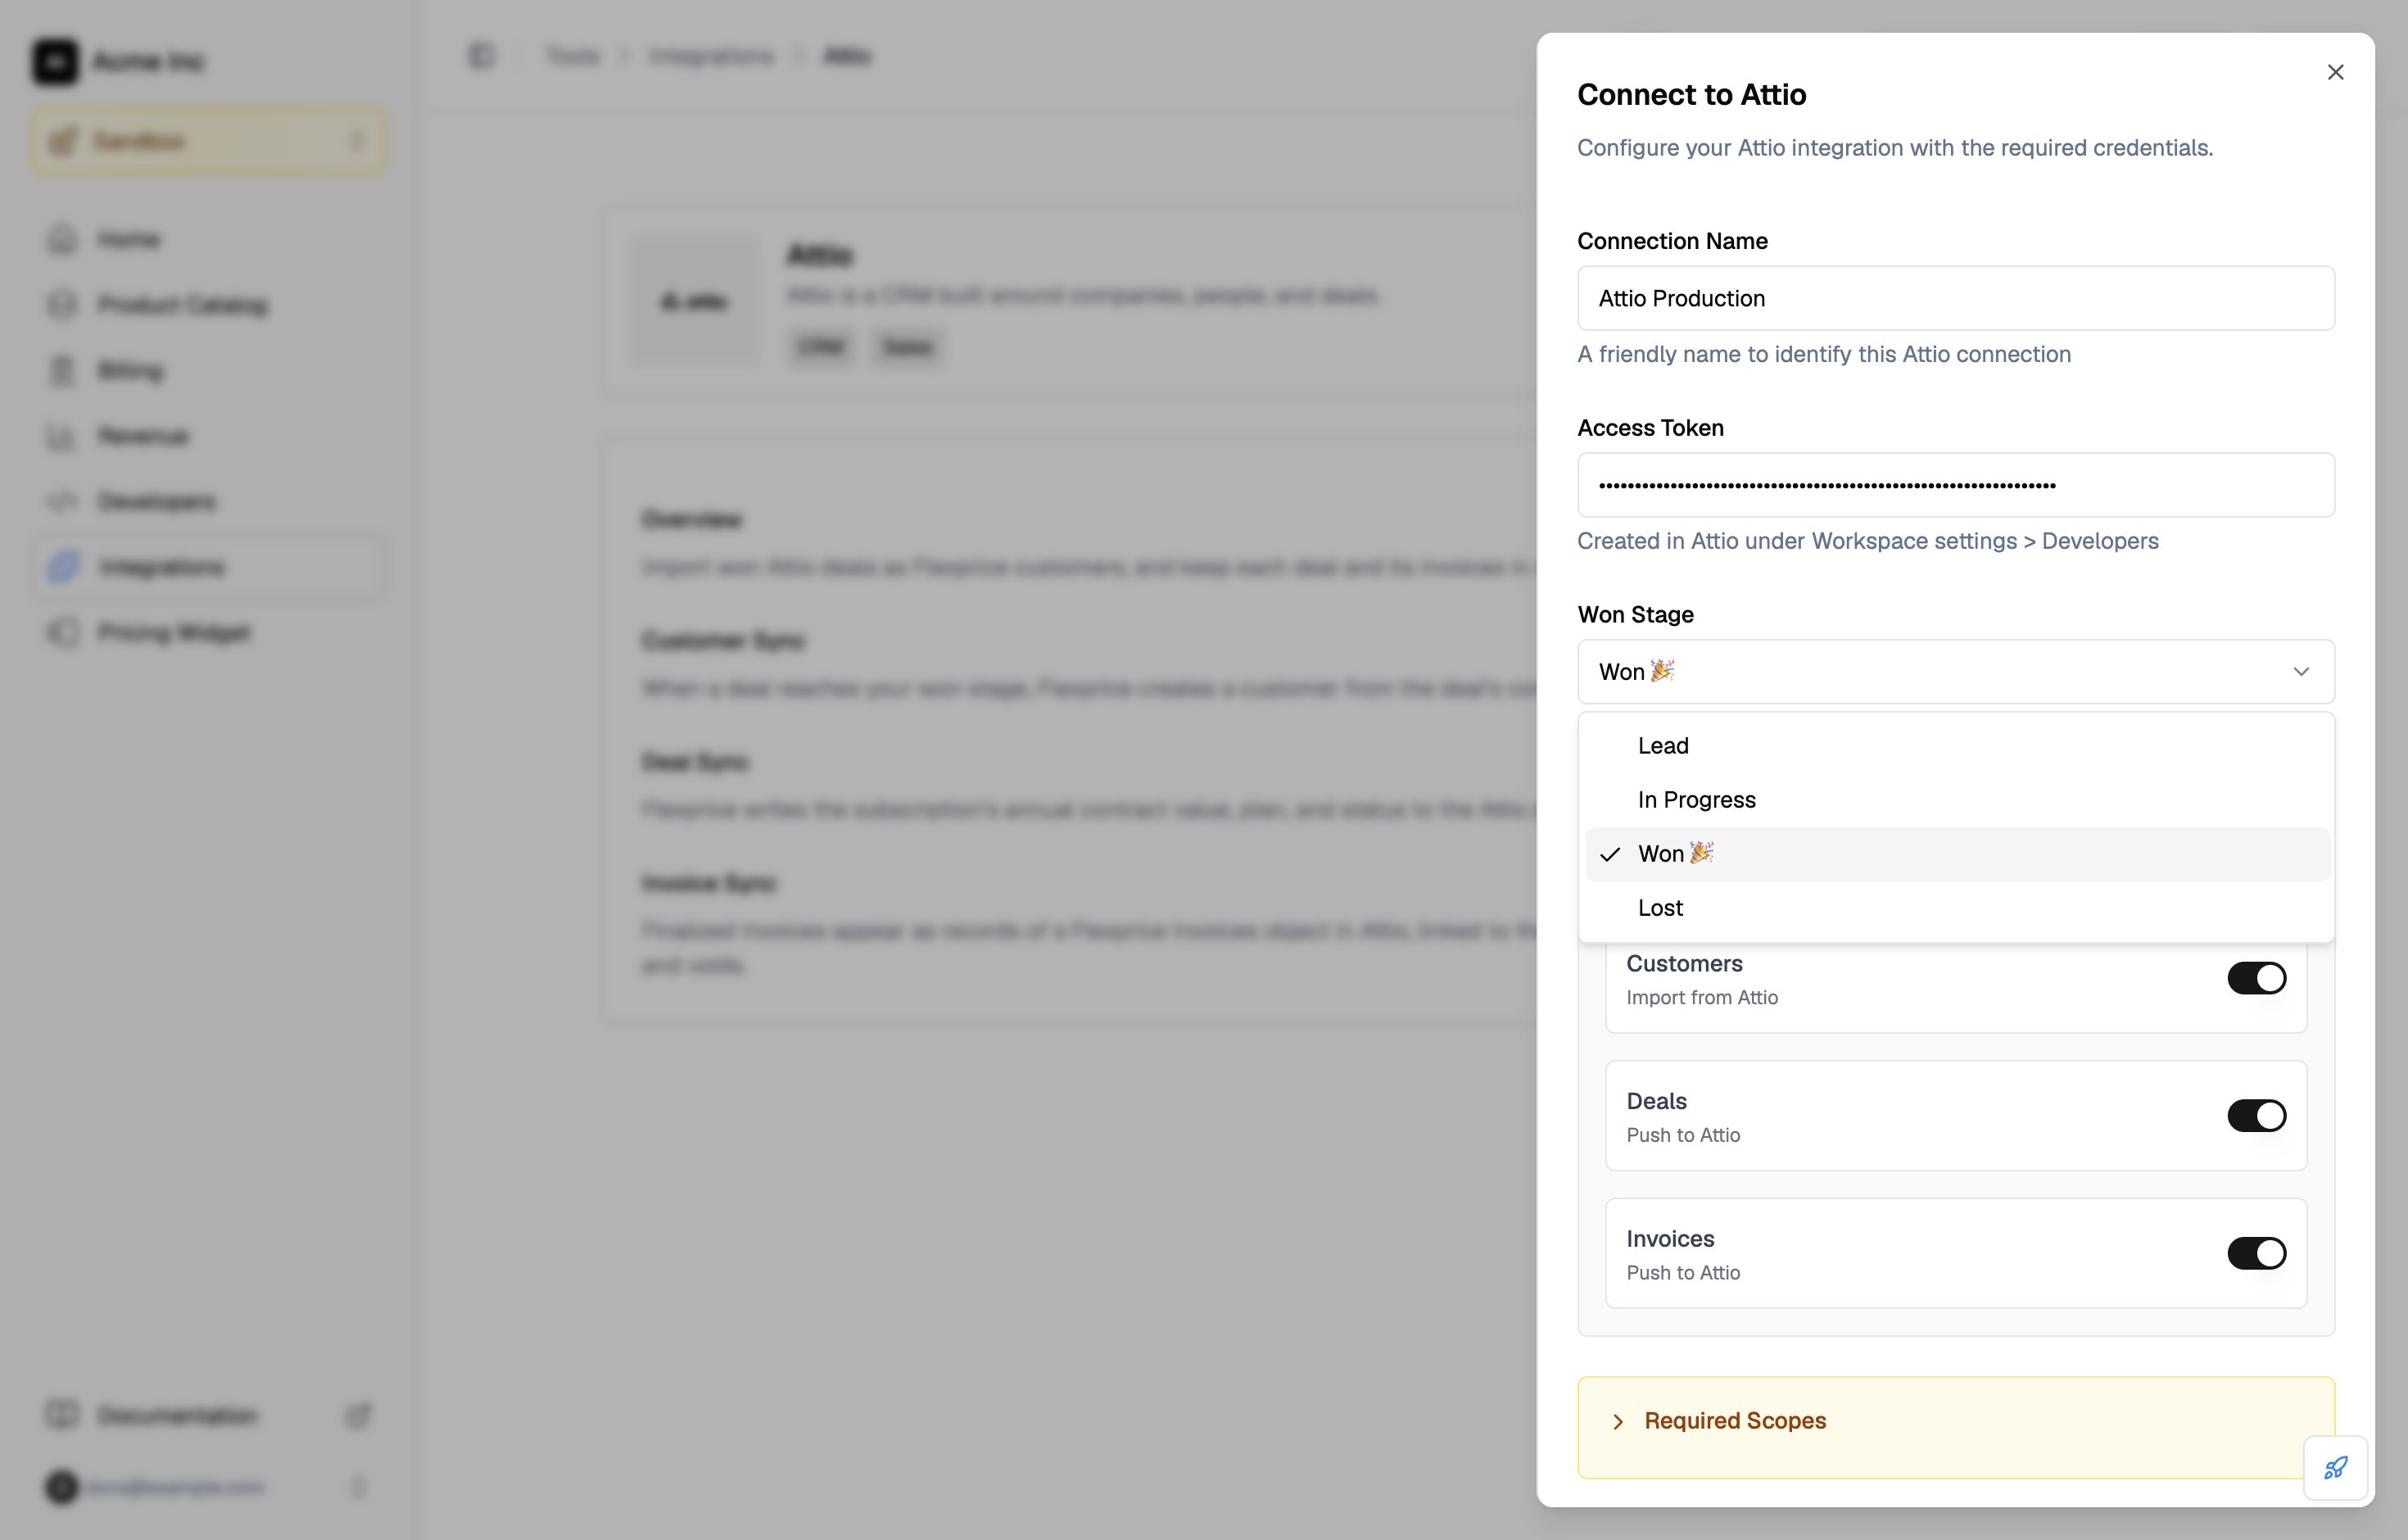
4
Choose what syncs
Under Sync Configuration, turn on Customers, Deals, and Invoices for the syncs you want. All three are off by default.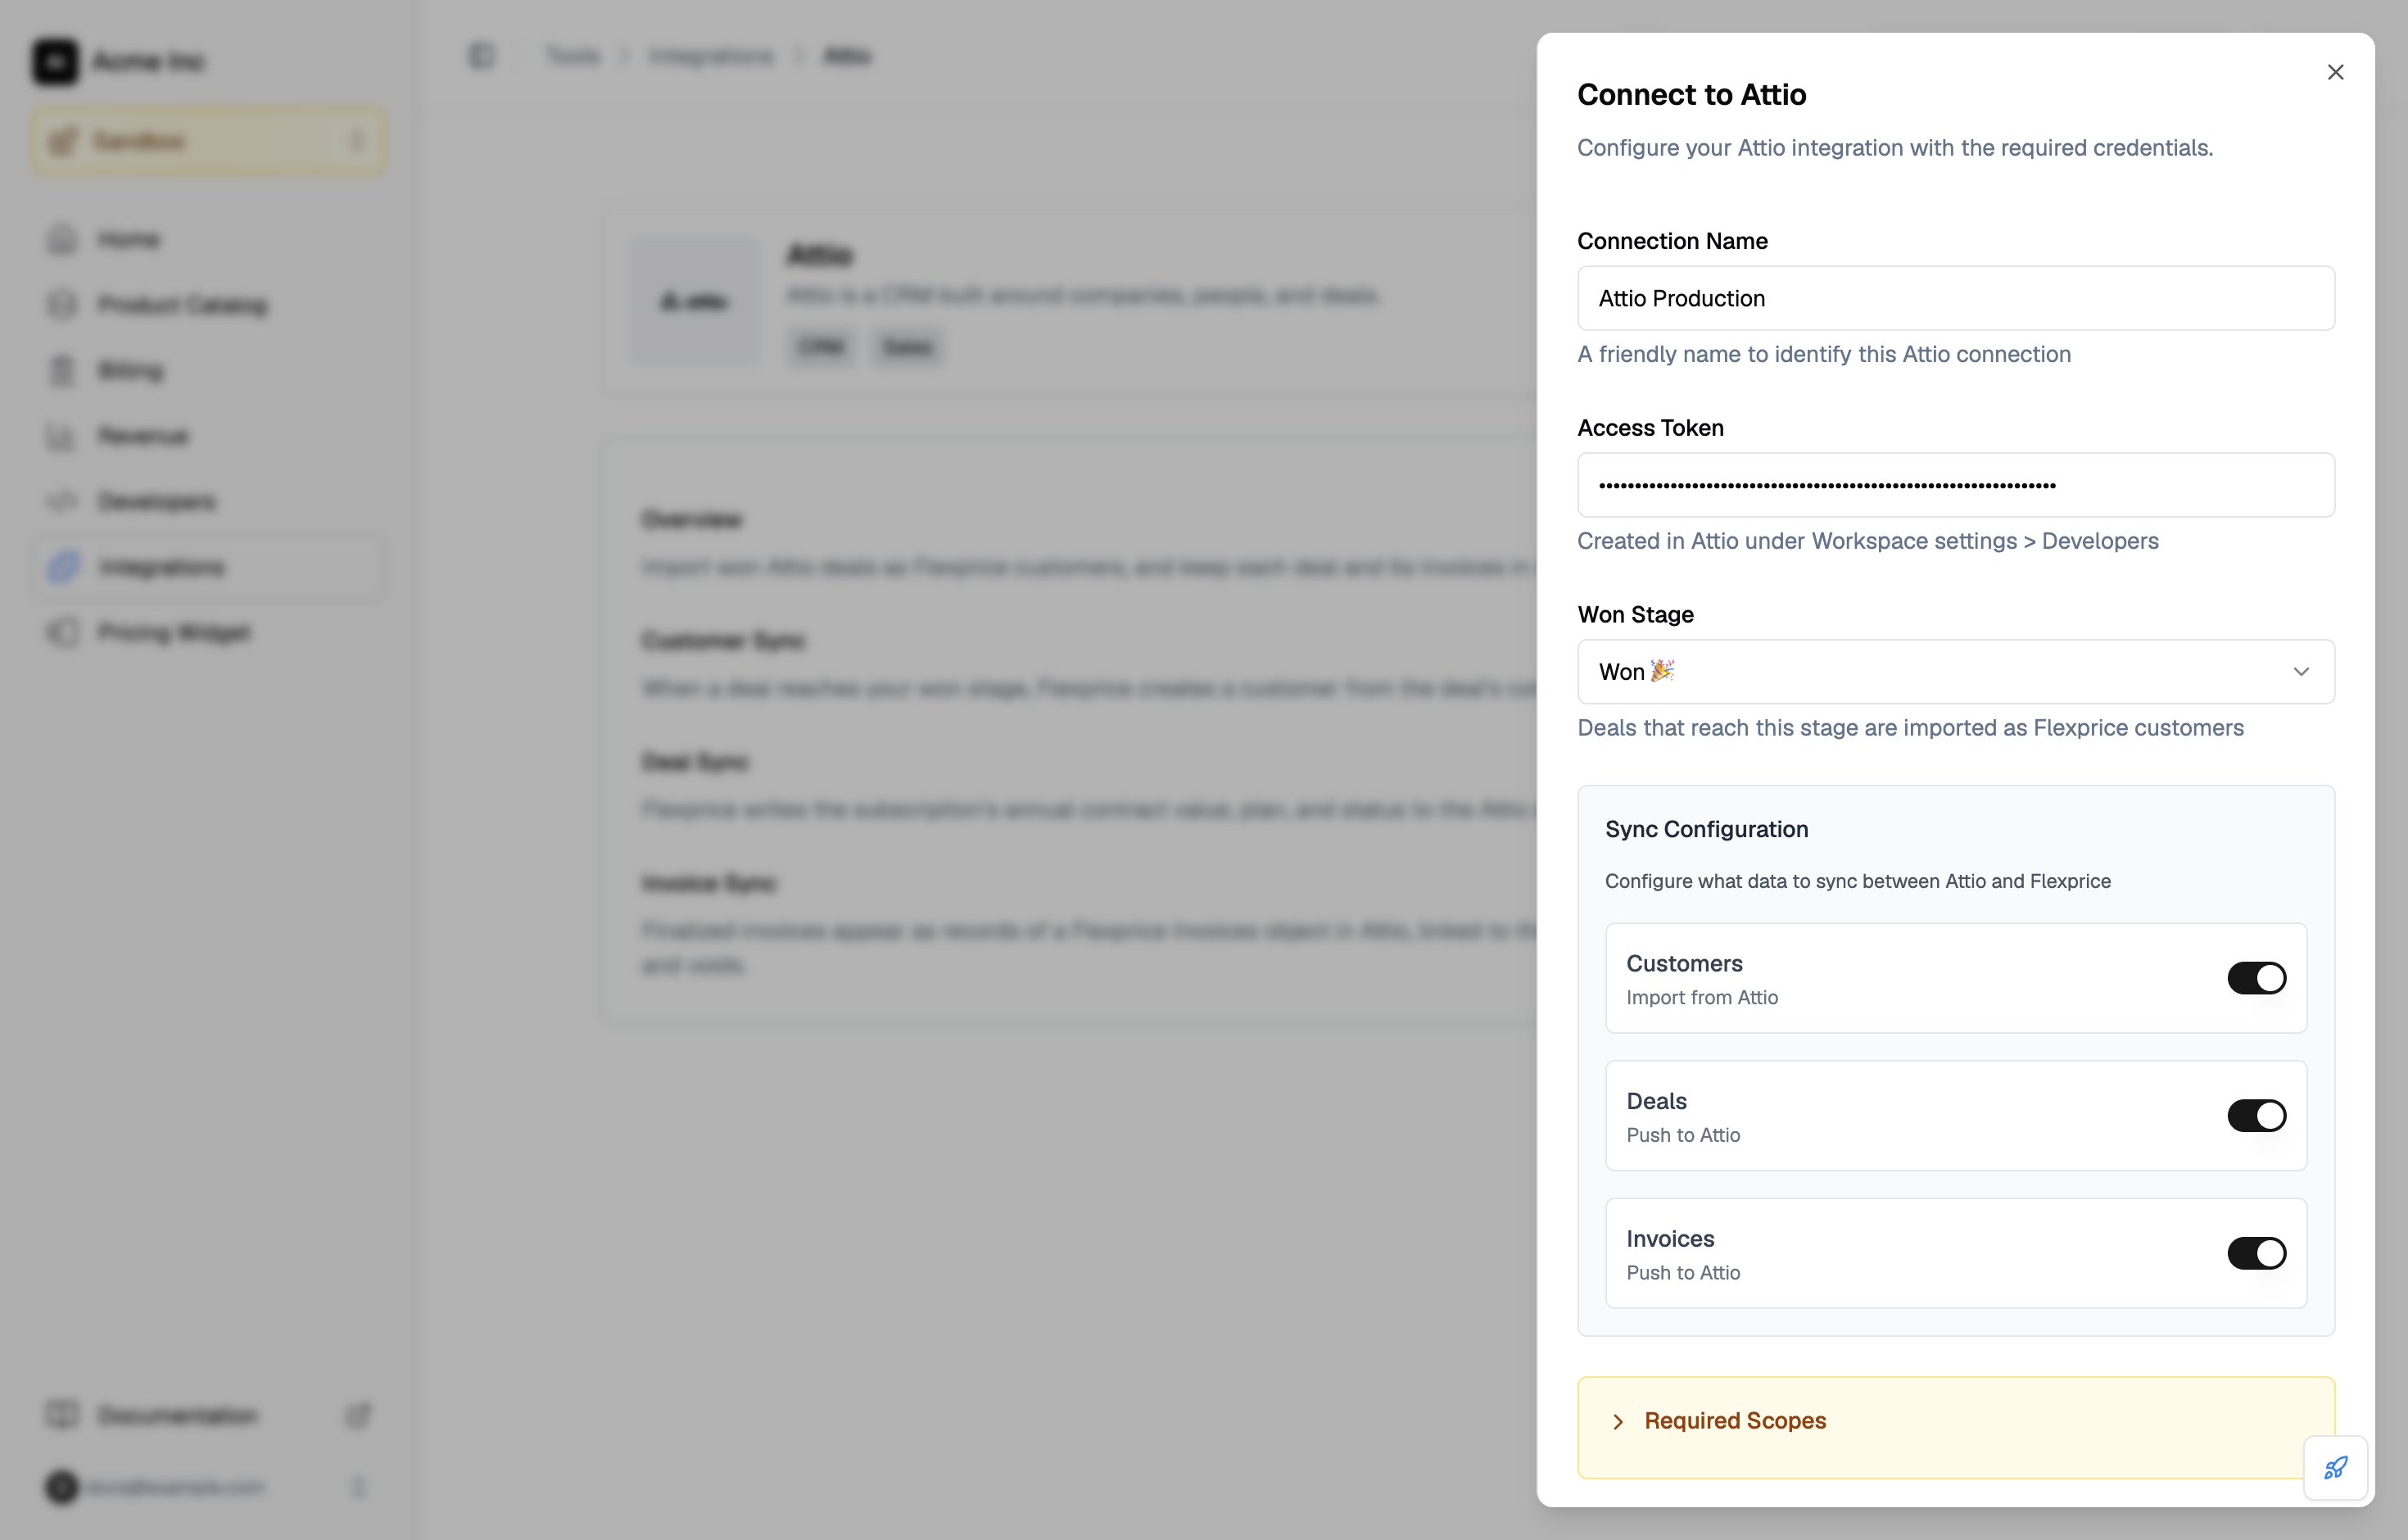
5
Review the webhook
Under Webhook Configuration, the drawer shows the URL that Flexprice registers in Attio. Expand Webhook Events to see the deal events it subscribes to. There is nothing to copy: Flexprice creates the webhook itself when you save the connection with Customers turned on.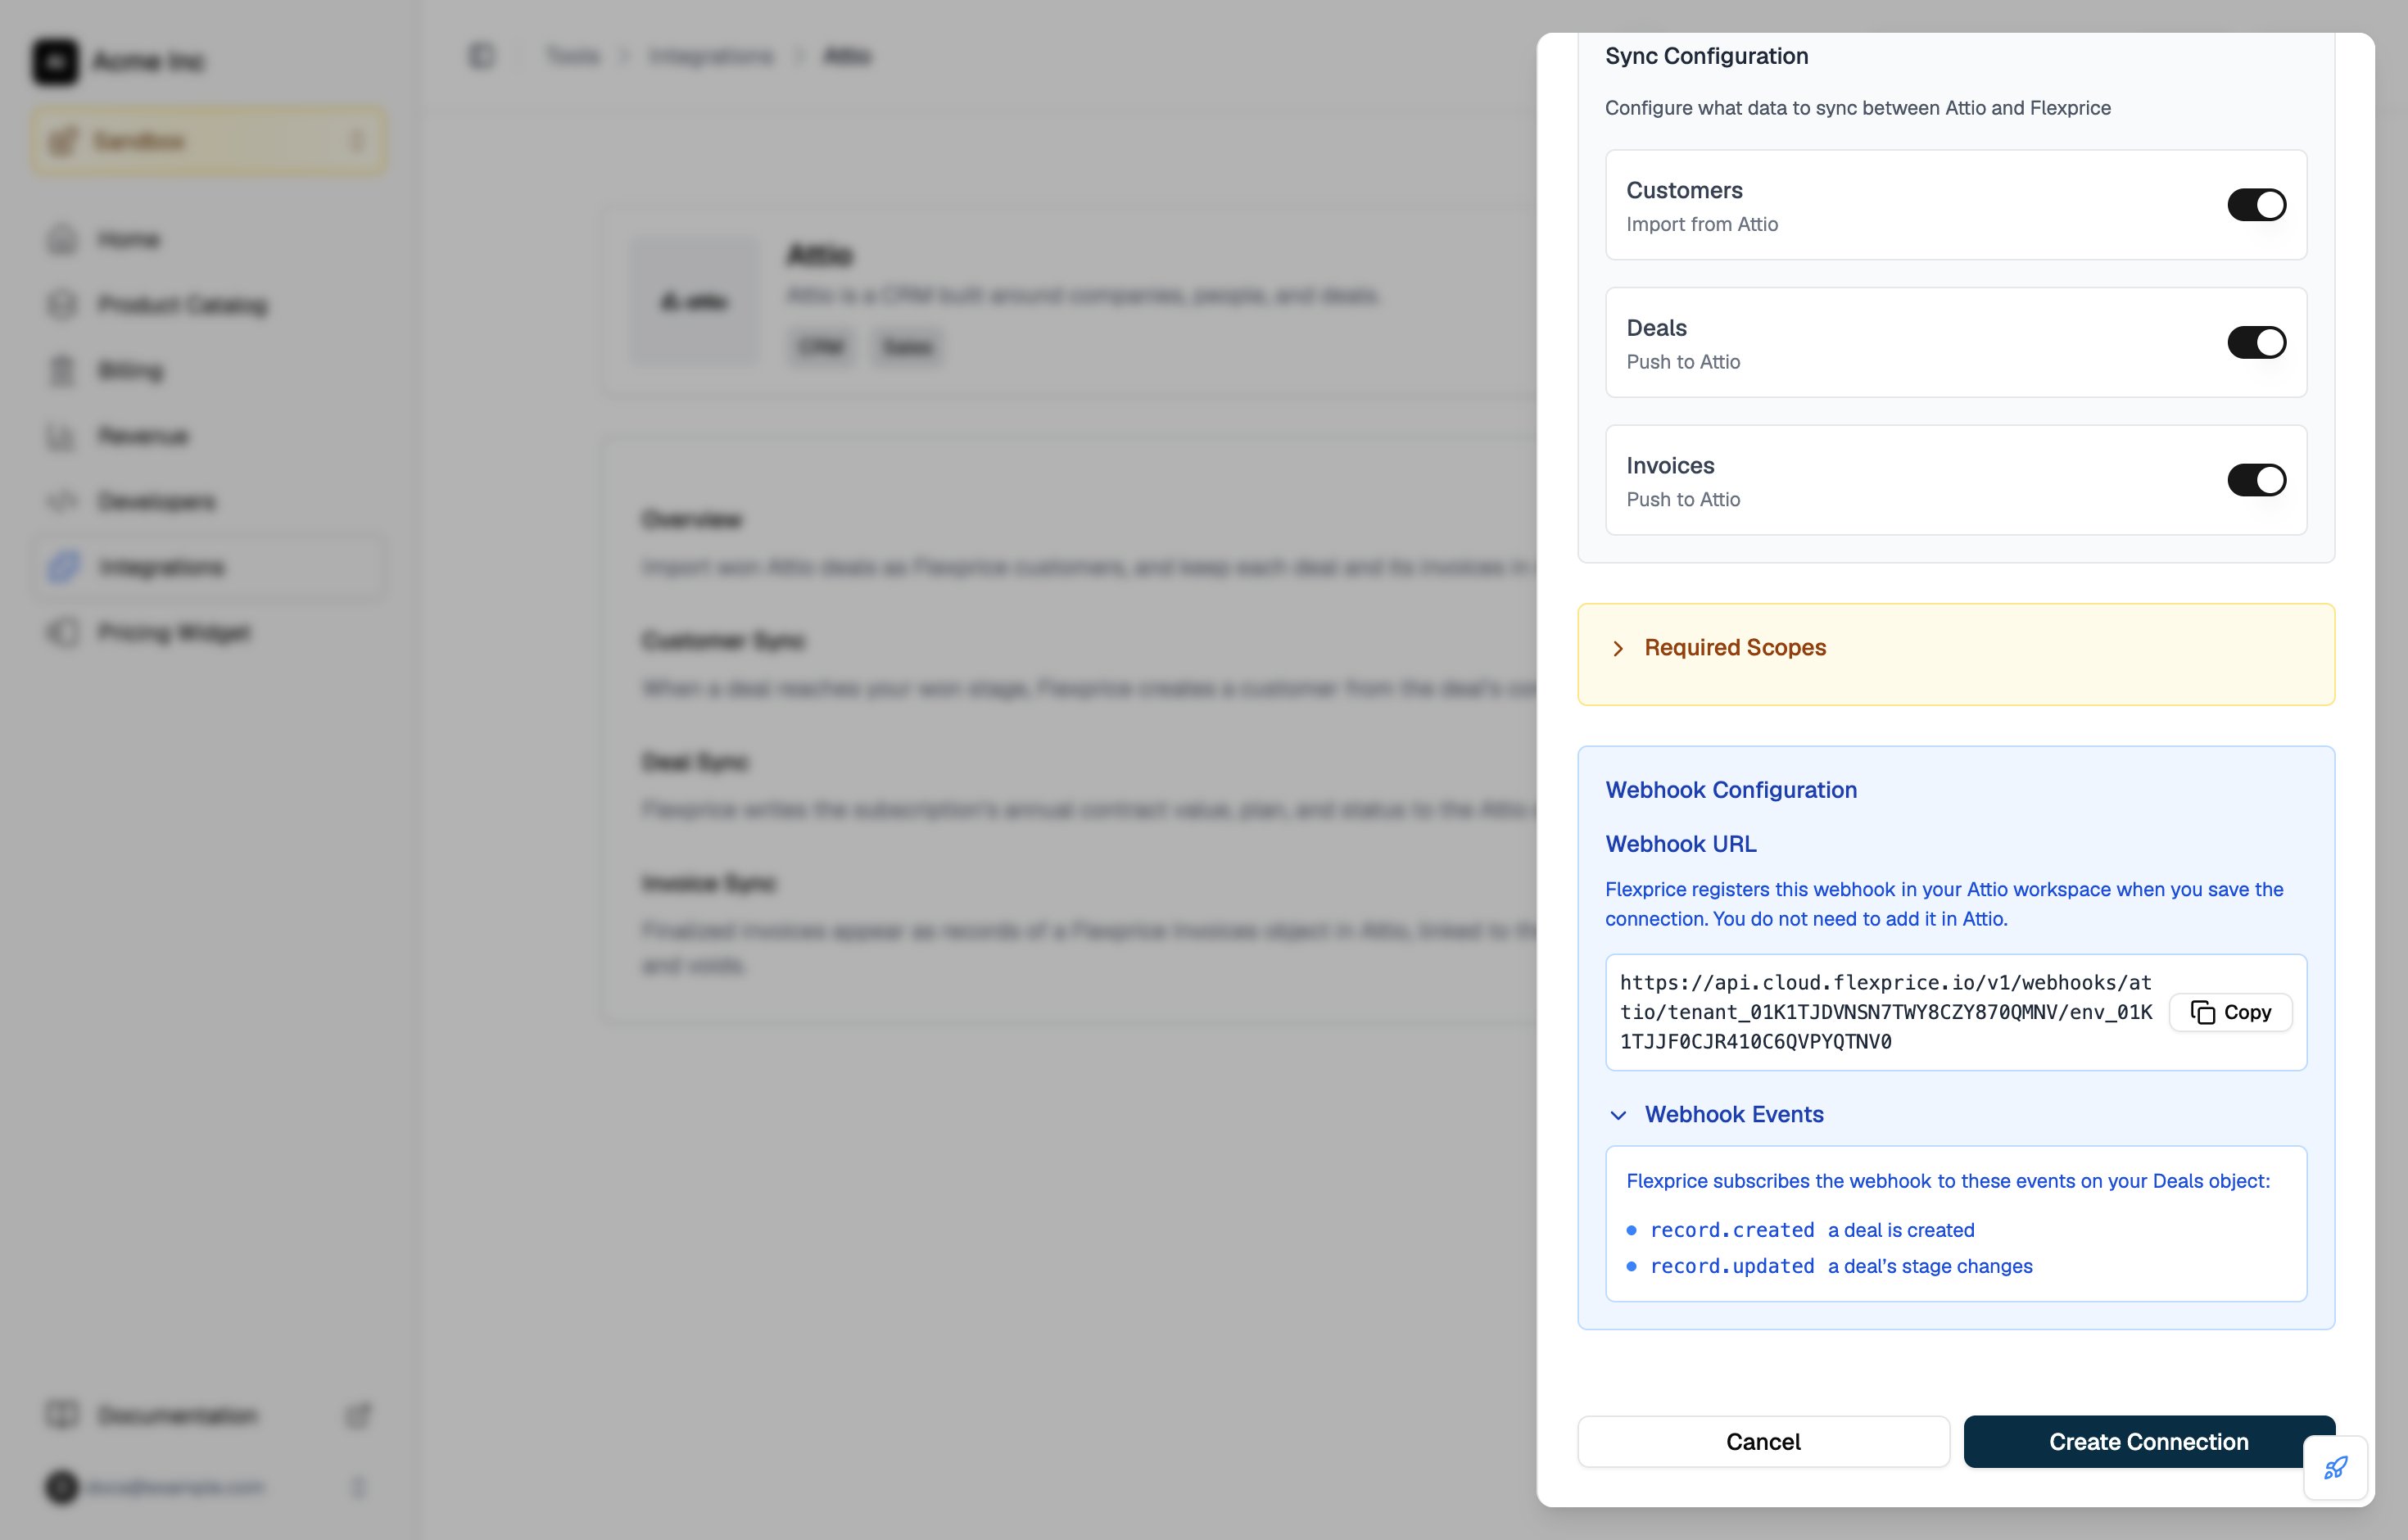
6
Save the connection
Click Create Connection. The connection appears under Connected Accounts on the Attio integration page.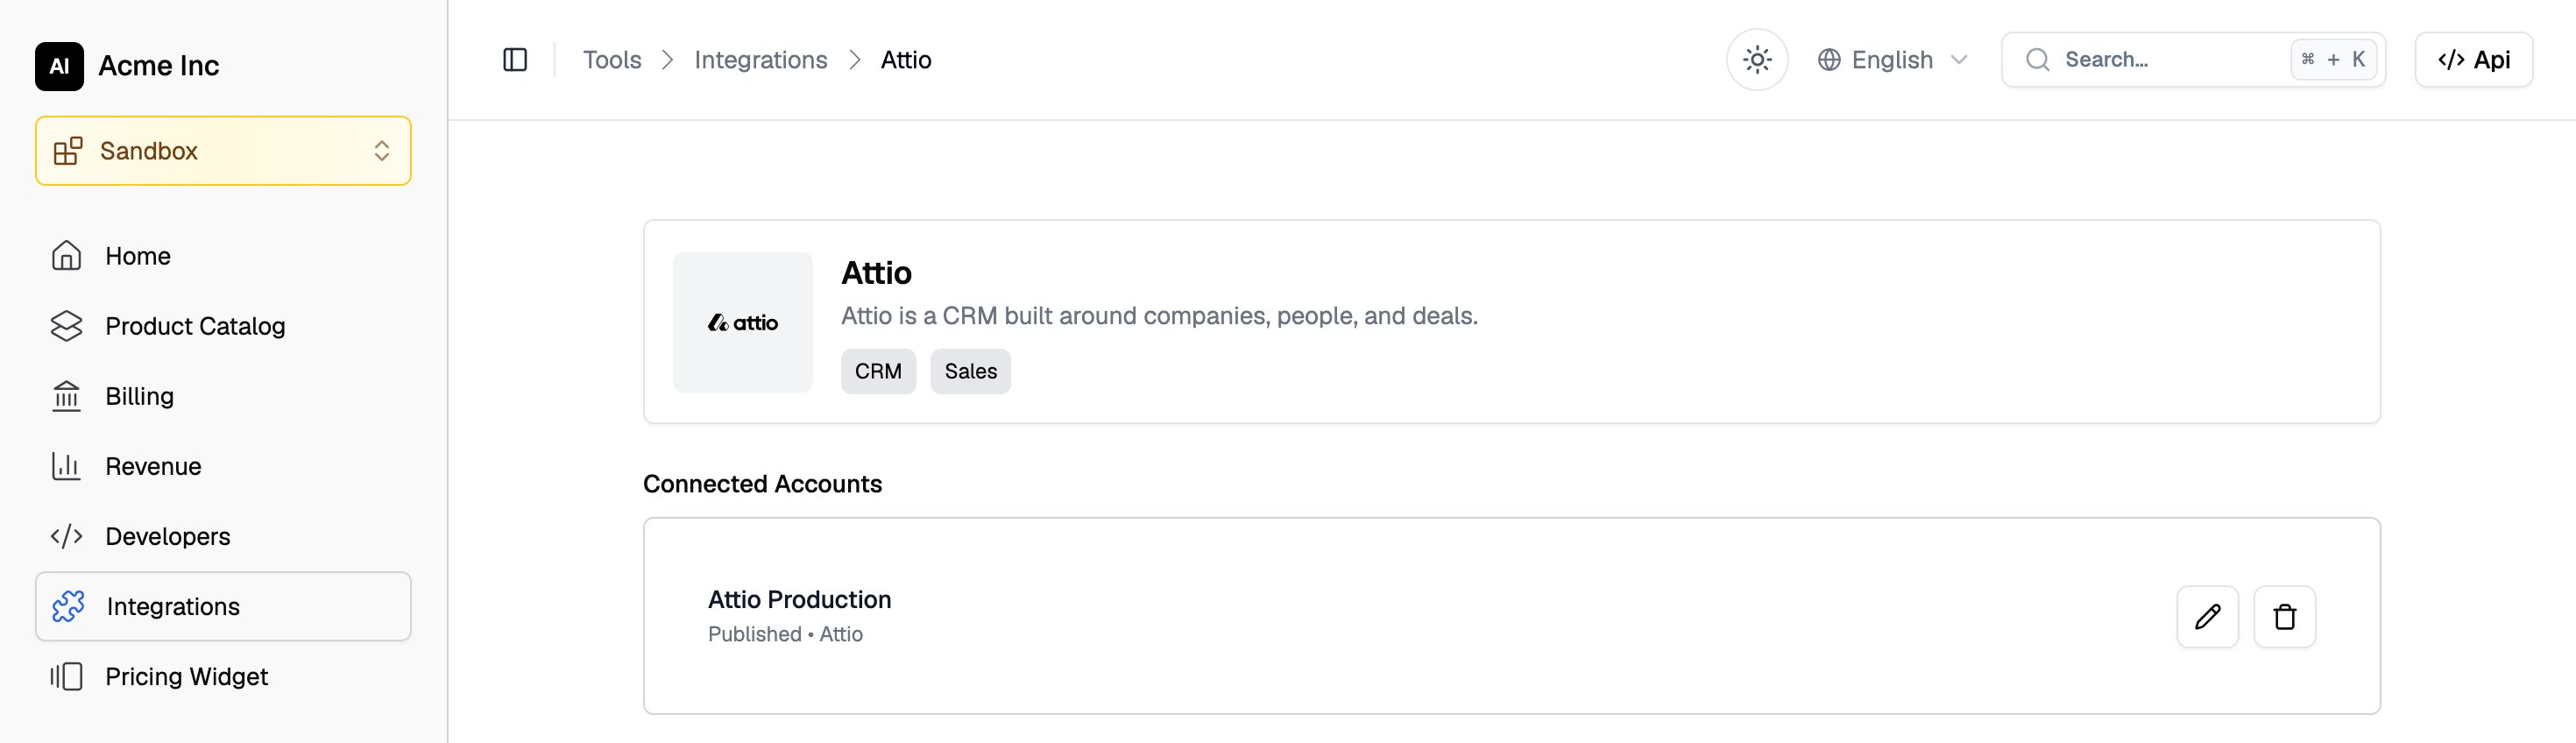
What Flexprice checks when you save the connection
- The token. Flexprice calls Attio’s
GET /v2/selfto confirm the token is active and holds the scopes for the syncs you turned on. If a scope is missing, Flexprice does not save the connection and names the missing scope. - The won stage. Flexprice looks up the stage on the
stageattribute of your Deals object and stores its ID. - The webhook. When Customers is on, Flexprice creates its webhook with Attio’s
POST /v2/webhooksand stores the signing secret that Attio returns, encrypted.
Creating the Attio connection with the API
If you leave out
sync_config, every sync is off. Customers only sync inbound, and deals and invoices only sync outbound, so Flexprice rejects the other direction for each of them.
How Flexprice receives Attio deal events
Flexprice registers one webhook for each Attio connection. It points at this URL:
The filters keep every other Attio change, such as an edited deal name or a new note, from reaching Flexprice. Attio events carry record IDs only, so after each event Flexprice reads the deal, its company, and its people through the Attio API.
Flexprice checks the
Attio-Signature header on every request, an HMAC-SHA256 of the request body signed with the webhook’s secret, and discards requests that fail the check. Attio retries a delivery that does not get a 2xx response up to 10 times over about three days, so a won deal is not lost when Flexprice is briefly unreachable.
The webhook is listed in Attio under Workspace settings → Developers, on the Webhooks tab. Flexprice manages it, so do not edit or delete it there: customer sync stops if its URL or events change.
Changing Attio connection settings
To change the connection name, the won stage, or the syncs, open Integrations → Attio in the Flexprice dashboard and click the pencil icon next to the connection under Connected Accounts. The edit drawer does not show the access token field.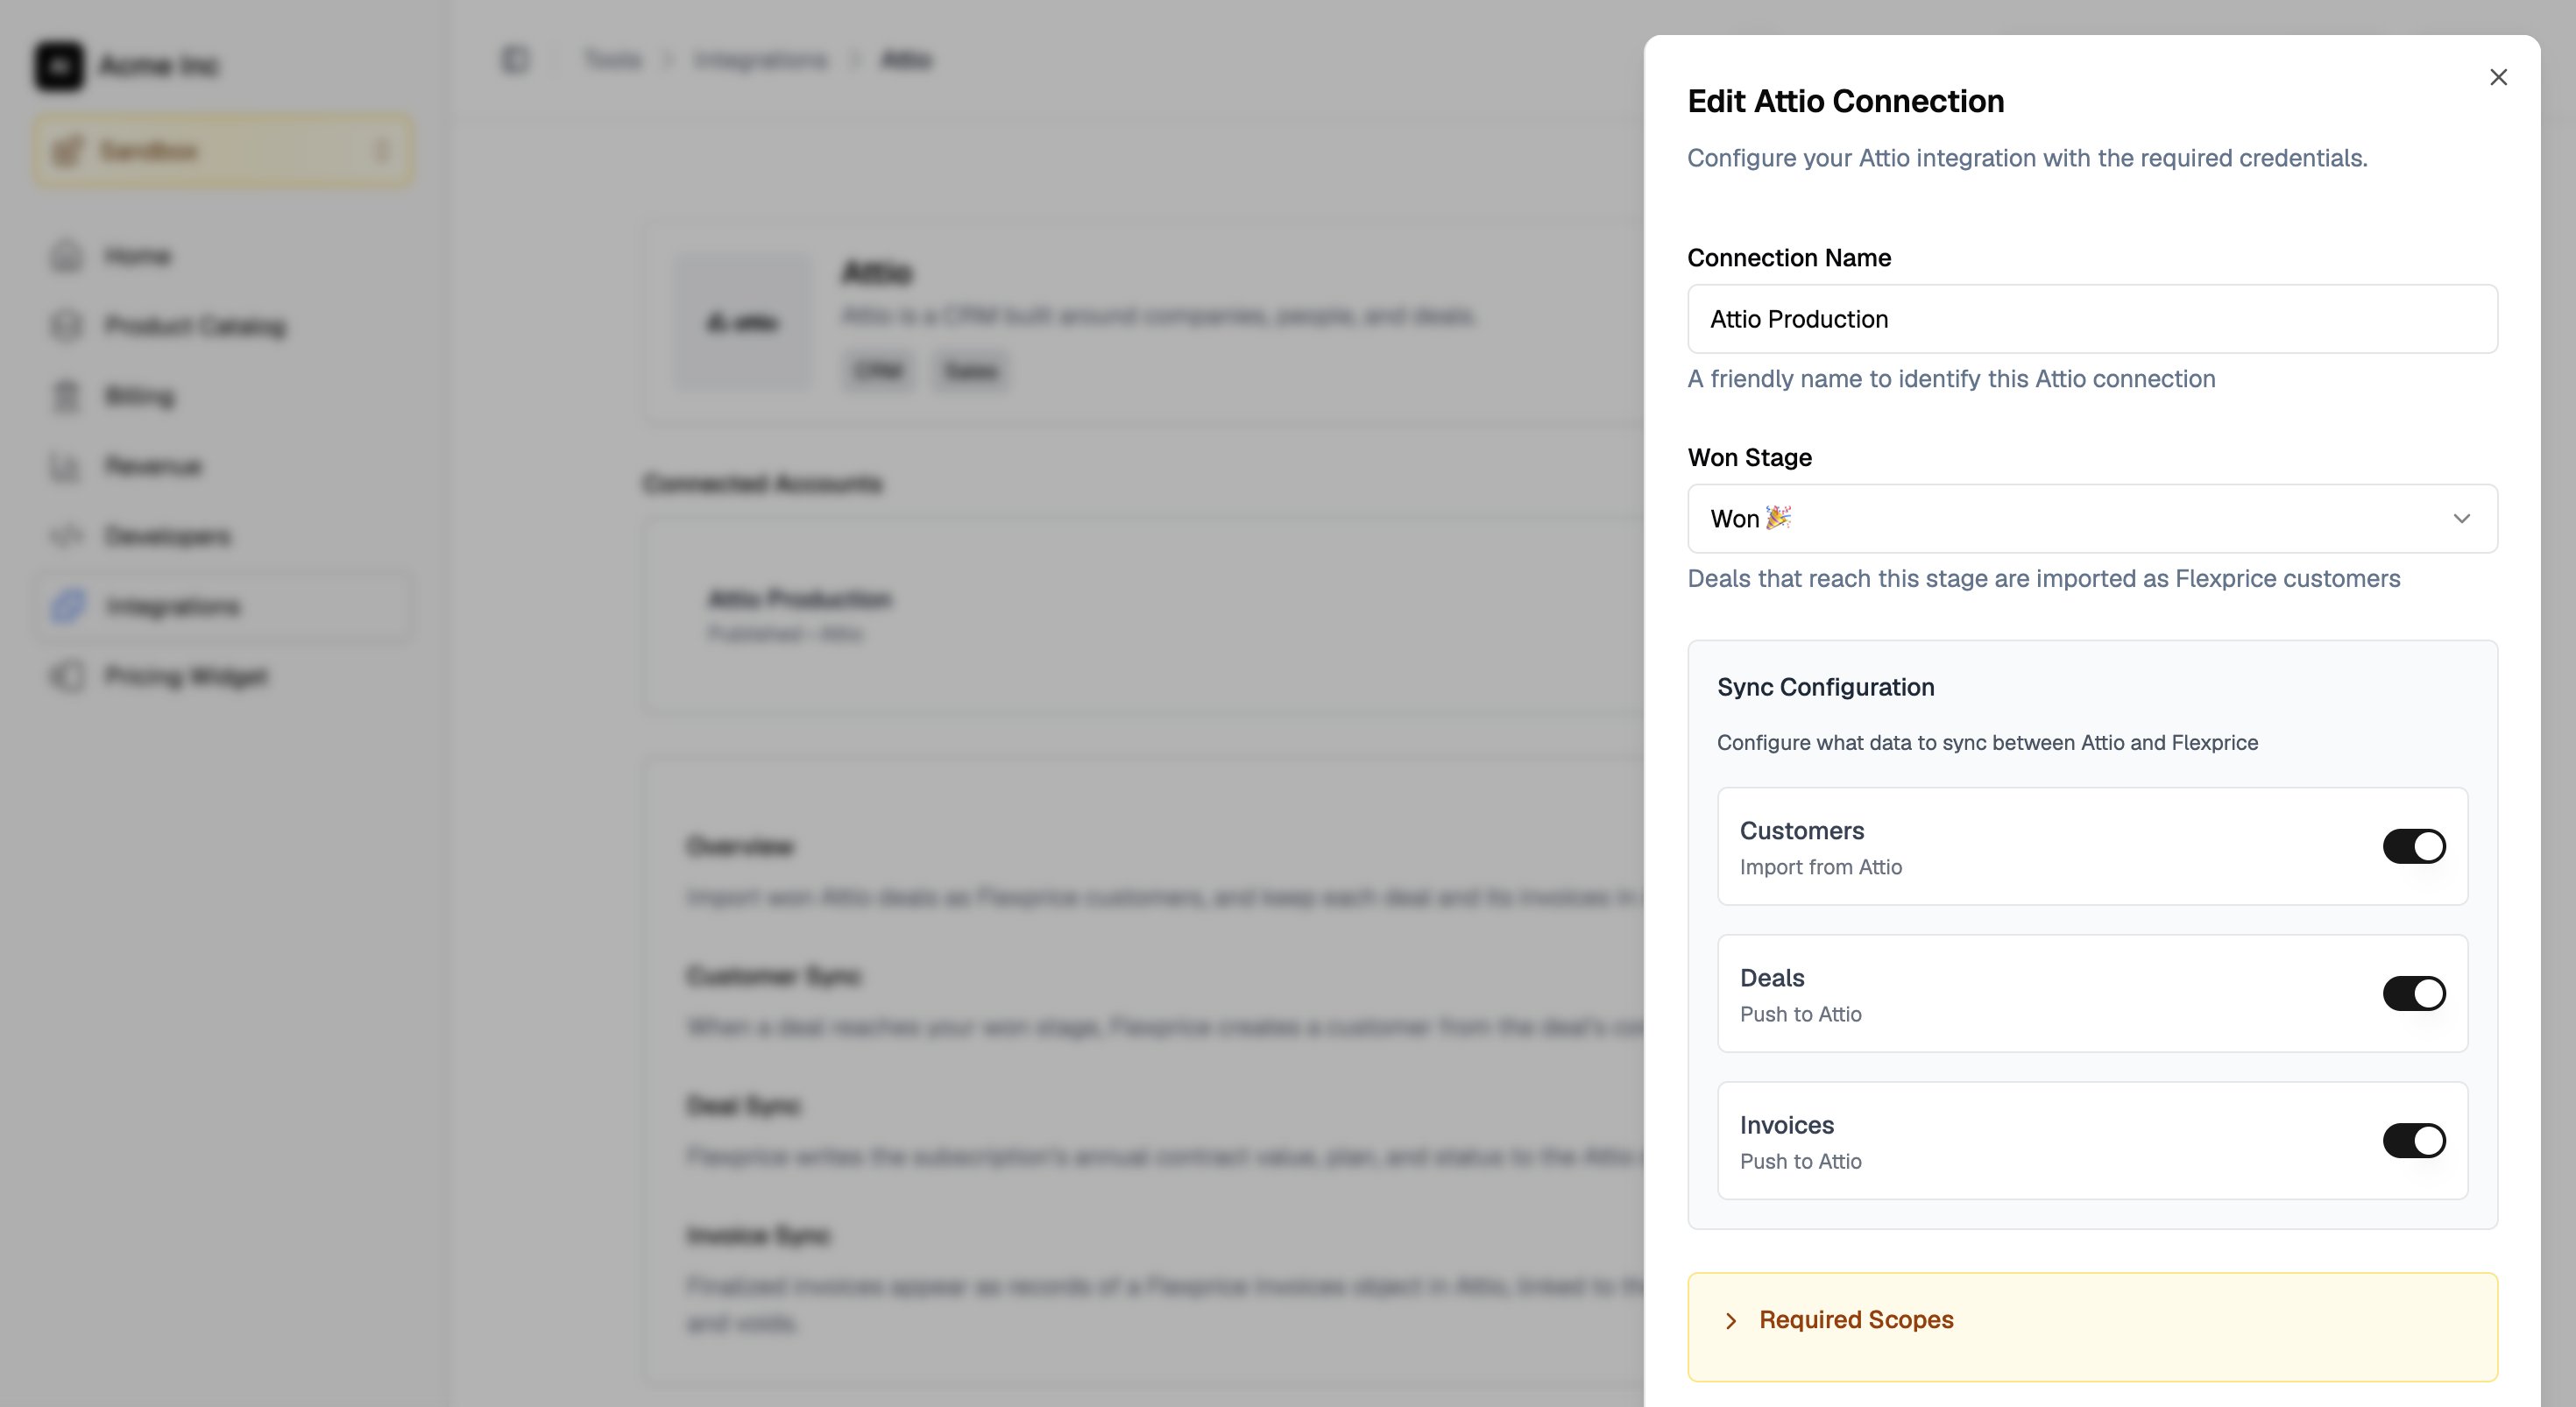
- Turning Customers off deletes the Flexprice webhook from Attio. Turning it back on registers a new one.
- Turning on Deals or Invoices later needs the matching scopes. Raise them on the token first, under Workspace settings → Developers → Access tokens in Attio, then turn on the toggle.
Troubleshooting the Attio connection
Attio sync guides
Customer sync
How the company on a won Attio deal becomes a Flexprice customer.
Deal sync
How the subscription’s value, plan, and status reach the Attio deal.
Invoice sync
How invoices appear in Attio and follow payments and voids.